Understanding Data Encryption
Data encryption is the process of converting plain text or other forms of data into a coded language that can only be read by authorized individuals. Encryption is an essential tool for protecting sensitive information from unauthorized access, theft, and other forms of cybercrime.
Reason to Encrypt Data on Mac
Encrypting data on a Mac is important for several reasons. Firstly, it helps to protect your sensitive information from unauthorized access in case your Mac is lost or stolen. Secondly, it ensures that your data is safe from hackers and other cybercriminals who may attempt to gain access to your system remotely. Furthermore, encrypting data on a Mac is often required by regulations and compliance standards in certain industries, such as healthcare and finance.
Benefits of Data Encryption
There are several benefits of data encryption on a Mac:
1. Protection against unauthorized access: Encryption ensures that only authorized users can access your sensitive data, even if your Mac falls into the wrong hands.
2. Security against cyber threats: Encryption protects your data from cyber threats such as hacking, malware, and phishing attacks.
3. Compliance with regulations: Encryption may be required by regulations and compliance standards in certain industries, such as healthcare and finance.
Mac Encryption Methods
There are two main encryption methods available on a Mac: FileVault and encrypted disk images.
1. FileVault: This is a built-in encryption feature that encrypts your entire startup disk. It uses XTS-AES 128 encryption to protect your data. Once enabled, FileVault requires a password to unlock your Mac and access your files.
2. Encrypted disk images: This method allows you to create an encrypted virtual disk that can be used to store sensitive files.
Third-Party Encryption Software Options
In addition to the built-in encryption methods on a Mac, there are also third-party encryption software options available. Some popular options include:
1. VeraCrypt: This is a free, open-source encryption software that can encrypt entire drives, and partitions, or create encrypted containers for files.
2. AxCrypt: This is a paid encryption software that allows you to encrypt individual files or folders on your Mac.
Choosing The Right Encryption Method For Your Needs
It depends on what you are looking to protect and how much security you require. It’s important to evaluate the features and capabilities of each option before making a decision. Additionally, it’s always wise to keep your encryption software up to date and to use strong, unique passwords to further enhance your security.
Preparing Your Mac for Encryption
To prepare your Mac for encryption, you should first back up all of your important files and data. This is important because encrypting your data can sometimes result in data loss or corruption if something goes wrong during the process. Next, you should ensure that your Mac is running the latest version of its operating system. This will help ensure that any known security vulnerabilities have been patched and that your system is as secure as possible.
Encrypting Your Entire Disk
- Step 1: Enabling FileVault
- Step 2: Creating a recovery key
- Step 3: Monitoring encryption progress
Encrypting Individual Files and Folders
To encrypt individual files and folders on your Mac, you can use the built-in encryption feature of macOS. Here’s how to do it:
Step 1: Select the file or folder you want to encrypt.
Step 2: Right-click on the file or folder and select “Encrypt [filename/foldername]”.
Step 3: Enter a password for the encrypted file or folder and click “Encrypt [filename/foldername]”.
Step 4: Wait for the encryption process to finish.
Using the built-in Disk Utility
To encrypt individual files and folders on your Mac using the built-in Disk Utility, follow these steps:
Step 1: Open Disk Utility, which can be found in the Utilities folder within the Applications folder.
Step 2: Click on “File” in the menu bar and select “New Image” and then “Blank Image”.
Step 3: Choose the file or folder you want to encrypt and select the desired size for the encrypted disk image.
Step 4: Select “128-bit AES encryption” or “256-bit AES encryption” from the Encryption drop-down menu.
Step 5: Choose a strong password and enter it in the fields provided. Make sure to remember this password or store it in a secure location.
Step 6: Click “Save” and choose a location to save the encrypted disk image.
Encrypting Email Communication
Encrypting email communication is an important step to protect your privacy and sensitive information. Here are the steps to encrypt your email communication:
Step 1: Use an email service that supports encryption, such as ProtonMail or Tutanota.
Step 2: Enable end-to-end encryption for your emails. This ensures that only the intended recipient can read the message.
Step 3: Use a strong password and two-factor authentication to secure your email account.
Setting Up Encrypted Email Clients
To set up an encrypted email client, follow these steps:
Step 1: Choose an email client that supports encryption, such as Thunderbird or Apple Mail.
Step 2: Install the email client on your device and open it.
Step 3: Go to the settings or preferences section of the email client.
Step 4: Look for the option to enable encryption and select it.
Step 5: Choose the type of encryption you want to use.
Using PGP/GPG Encryption
Step 1: If you choose to use PGP/GPG encryption, you will need to generate a public and private key pair. This can be done through the email client’s settings or a third-party tool like GnuPG.
Step 2: Share your public key with anyone you want to communicate with securely.
Step 3: When composing an email, select the option to encrypt the message and choose the recipient’s public key.
Step 4: Send the encrypted email.
By following these steps, you can ensure that your email communication remains secure and private. It’s important to note that both you and the recipient must have encryption set up for it to work effectively.
Best Practices For Secure Email Communication
In addition to using encryption, here are some best practices for secure email communication:
1. Use strong passwords and two-factor authentication to protect your email account.
2. Be cautious of phishing emails and do not click on any suspicious links or attachments.
3. Avoid sending sensitive information such as passwords or financial information through email.
4. Regularly update your software and operating system to ensure that security vulnerabilities are patched.
5. Use a reputable email service provider that has strong security measures in place.
Secure Web Browsing on Mac
Here are some tips for secure web browsing on a Mac:
1. Use a reputable web browser such as Safari, Firefox, or Chrome.
2. Keep your browser and operating system up to date with the latest security patches.
3. Use a virtual private network (VPN) to encrypt your internet traffic and protect your privacy.
4. Avoid clicking on suspicious links or downloading files from untrusted sources.
5. Use ad-blocking and anti-tracking extensions to prevent websites from tracking your online activity.
Understanding HTTPS and SSL/TLS

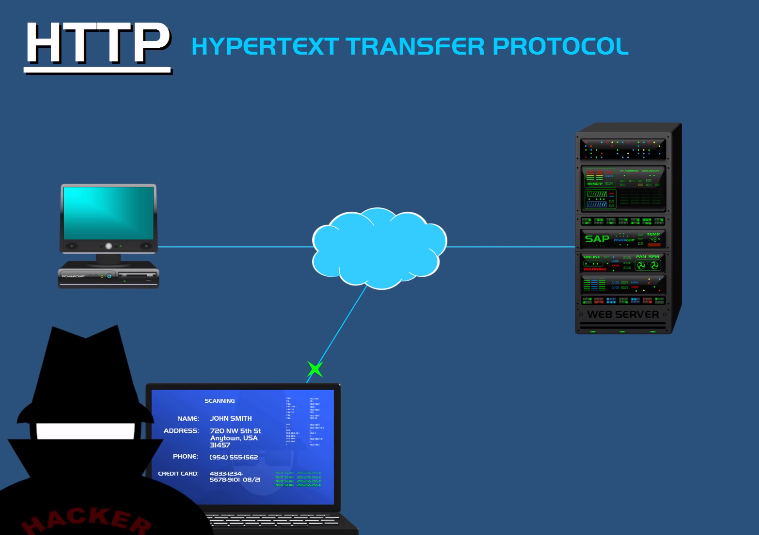
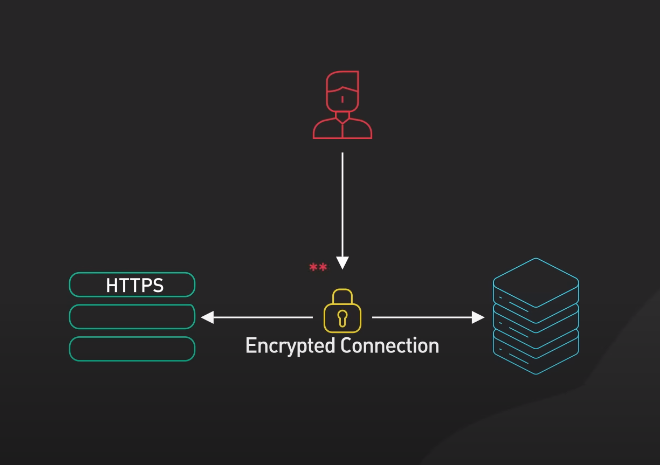
HTTPS stands for Hypertext Transfer Protocol Secure, which is a protocol used for secure communication over the Internet. It is essentially the same as HTTP but with an added layer of security provided by SSL/TLS (Secure Sockets Layer/Transport Layer Security) encryption.SSL/TLS is a protocol used to encrypt data that is transmitted over the internet, making it difficult for anyone to intercept or read the data.
Configuring Browser Security Settings

Configuring browser security settings is an important step in ensuring your online safety. Here are some steps you can take:
1. Use a trusted browser: Choose a browser that is known for its security features, such as Google Chrome or Mozilla Firefox.
2. Enable HTTPS: Make sure your browser is set to use HTTPS by default. This will ensure that your data is encrypted when you visit websites.
3. Disable third-party cookies: Cookies are small files that websites use to track your activity.
4. Use a VPN: A virtual private network (VPN) can encrypt your internet traffic and hide your IP address, making it difficult for anyone to track your online activity.
5. Keep your software up to date: Make sure your browser, operating system, and other software are updated with the latest security patches. This will help protect you from known vulnerabilities.
6. Use strong passwords: Use a unique password for each of your online accounts and make sure they are strong and complex.
Securely Deleting Files on Mac

To securely delete files on a Mac, follow these steps:
1. Select the file(s) you want to delete.
2. Right-click on the file(s) and select “Move to Trash.”
3. Open the Trash folder by clicking on the Trash icon in the dock.
4. Hold down the “Option” key on your keyboard and click on “Empty Trash.”
5. A pop-up window will appear asking if you want to permanently erase the items in the Trash.
Understanding Secure File Deletion Methods
Secure file deletion methods are used to ensure that deleted files cannot be recovered by unauthorized users. There are several methods for securely deleting files, including:
1. Overwriting: This method involves overwriting the deleted file with random data to make it unrecoverable.
2. Encryption: Encrypting the file before deleting it ensures that the file cannot be accessed without the encryption key.
3. Physical destruction: Physically destroying the storage device containing the deleted file, such as a hard drive or flash drive.
Using The Built-In Secure Empty Trash Feature
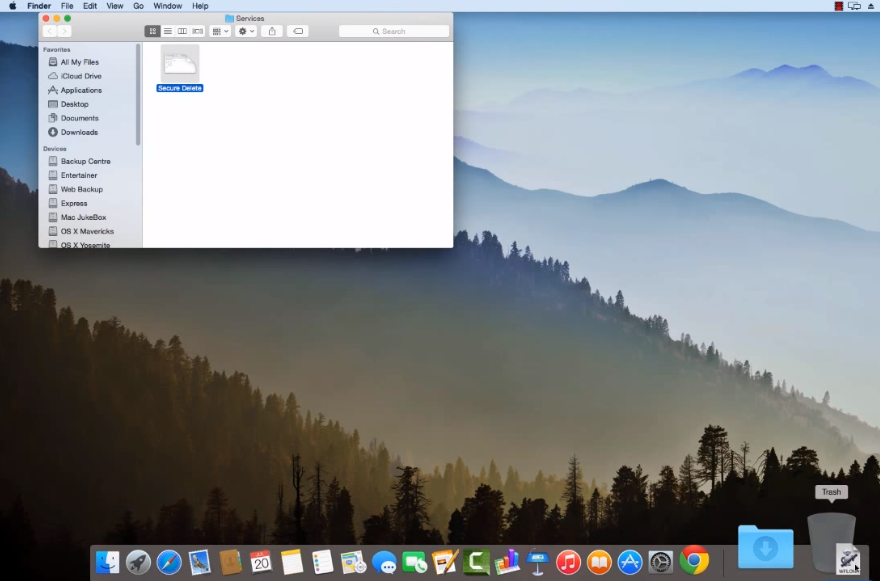
Using the built-in Secure Empty Trash feature is also an effective way to securely delete files on a Mac. This feature overwrites the deleted files with random data, making them unrecoverable. To use this feature, simply right-click on the Trash icon in the Dock, hold down the Command key, and select “Secure Empty Trash.” Keep in mind that this process may take longer than a regular emptying of the Trash, as it is overwriting the data multiple times to ensure its complete deletion.
Third-Party File Shredding Tools For Mac
There are also third-party file shredding tools available for Mac that provide additional options for securely deleting files. Some popular options include Shredo, Permanent Eraser, and MacCleanse. These tools offer various levels of security and customization, allowing users to choose the level of deletion they need for their specific needs. However, it’s important to research and choose a reputable tool to ensure the security of your data.
FAQs
What is the difference between encryption and password protection?

Encryption and password protection are both methods of securing data, but they work in different ways. Encryption is the process of converting data into a code or cypher that can only be deciphered with a key or password. This means that even if someone gains access to the encrypted data, they won’t be able to read it without the key or password.
Password protection, on the other hand, simply requires a password to access the data. This can be a simple password that anyone can guess or a complex one that is difficult to crack. Password protection doesn’t necessarily encrypt the data, so if someone gains access to the data, they can read it without any additional steps.
In summary, encryption is a more secure way to protect data, as it requires both a password and a key to access the data. Password protection is less secure, as it only requires a password to access the data.
Can I encrypt an external hard drive on Mac and use it on Windows?
Yes, you can encrypt an external hard drive on a Mac using the built-in encryption tool called FileVault. Once encrypted, the drive can be used on a Windows computer, but you will need to enter the password and provide the encryption key to access the data. To do this, you can use a tool like BitLocker on Windows to unlock the encrypted drive.
What should I do if I forget my FileVault password?
If you forget your FileVault password on a Mac, you will need to reset it using your Apple ID. Here are the steps:
1. Restart your Mac and hold down the Command and R keys until the Apple logo appears.
2. Select “Utilities” from the menu bar and then choose “Terminal.”
3. Type “reset password” (without quotes) in the Terminal window and press Enter.
4. Follow the on-screen instructions to reset your password using your Apple ID.
Conclusion
In conclusion, if you need to securely delete files on your Mac, there are several options available. While the built-in Secure Empty Trash feature can provide some level of security, third-party files shredding tools like Shredo, Permanent Eraser, and MacCleanse offer additional customization and security features. It’s important to choose a reputable tool and research the level of security it provides to ensure the safety of your data.
