Re-partitioning your hard drive in Windows 10 is a crucial task that can enhance your computer’s performance and data organization. This process involves dividing your disk into sections, allowing you to allocate space for different purposes efficiently. You might consider re-partitioning to optimize disk space, create partitions for dual-boot setups, or streamline data management. Before you start, remember to back up your data and check your disk’s health. The step-by-step guide provided in this article outlines how to re-partition in Windows 10, from opening Disk Management to formatting new partitions. Additionally, we emphasized the importance of maintaining balanced partitions and conducting regular maintenance for peak performance.
Why Re-Partitioning Matters?

Re-partitioning serves as a crucial maintenance task for your Windows 10 computer.
1. Enhance Disk Space Management
One of the primary reasons for re-partitioning is to optimize disk space utilization. Over time, your storage needs change, and you might find that some partitions become overcrowded while others remain underutilized. Re-partitioning allows you to reallocate space according to your evolving requirements, ensuring a balanced and efficient storage environment.
2. Facilitate Dual Boot Configurations
For advanced users and tech enthusiasts, the ability to run multiple operating systems on a single machine is invaluable. Re-partitioning your hard drive is a prerequisite for creating separate partitions for different OS installations, enabling you to explore various platforms without compromising system stability.
3. Streamline Data Organization
Data organization plays a crucial role in data management and backup processes. By segregating your personal files from the operating system and application data, you improve your backup strategies and simplify data retrieval and maintenance.
Preparing for a Successful Re-Partitioning:
Data Backup – Your First Line of Defense
Before embarking on any re-partitioning endeavor, you must prioritize data backup. While re-partitioning itself is generally a safe process, there is always a minimal risk of data loss, especially if unexpected issues arise during the operation. Creating a comprehensive backup of your important files and documents protects your data against any unforeseen circumstances.
Disk Health Assessment
Checking the health of your disk is a crucial preliminary step. Windows provides built-in tools like the CHKDSK utility, which scans for disk errors and bad sectors. Repairing any identified issues before re-partitioning ensures a smooth and error-free process.
The Step-by-Step Guide to Re-Partitioning:

Step 1: Navigating Disk Management
To begin the re-partitioning process, follow these steps:
- Press Win + X: This keyboard shortcut opens the Quick Link menu.
- Select “Disk Management”: Choose this option to access the Disk Management utility.
- Locate Your Target Disk: In the lower section of the Disk Management window, identify the disk you intend to re-partition.
Step 2: Shrinking an Existing Partition
Shrinking an existing partition is the initial step towards creating new partitions. Here’s how you can do it:
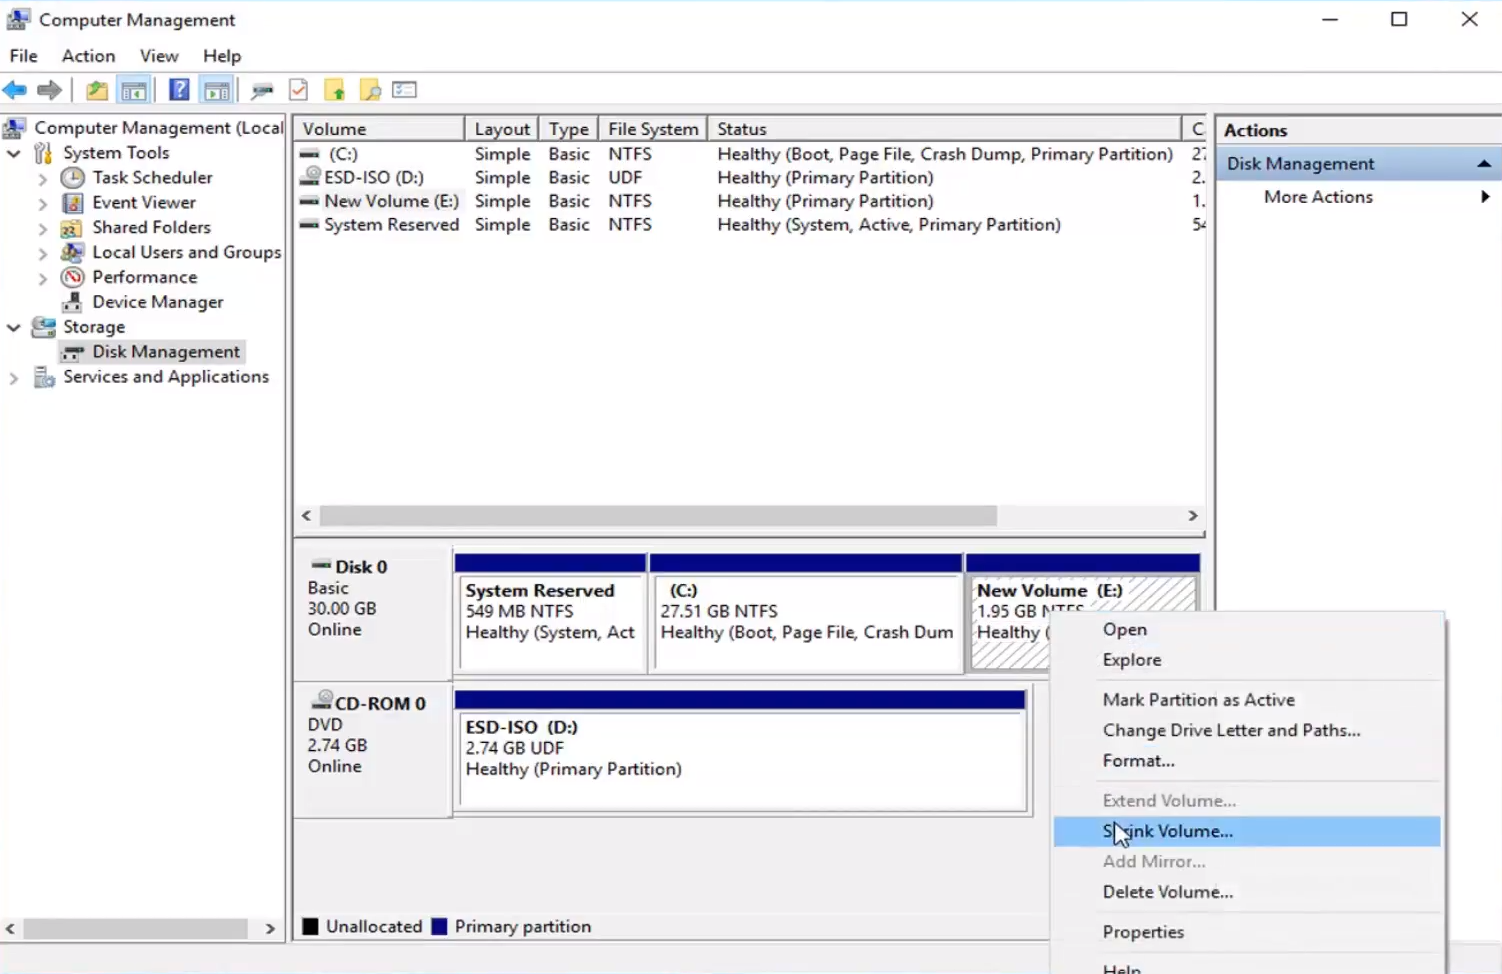
- Right-click on the Partition to Shrink: Locate the partition you want to shrink in the Disk Management window.
- Select “Shrink Volume”: This action initiates the partition shrinking process.
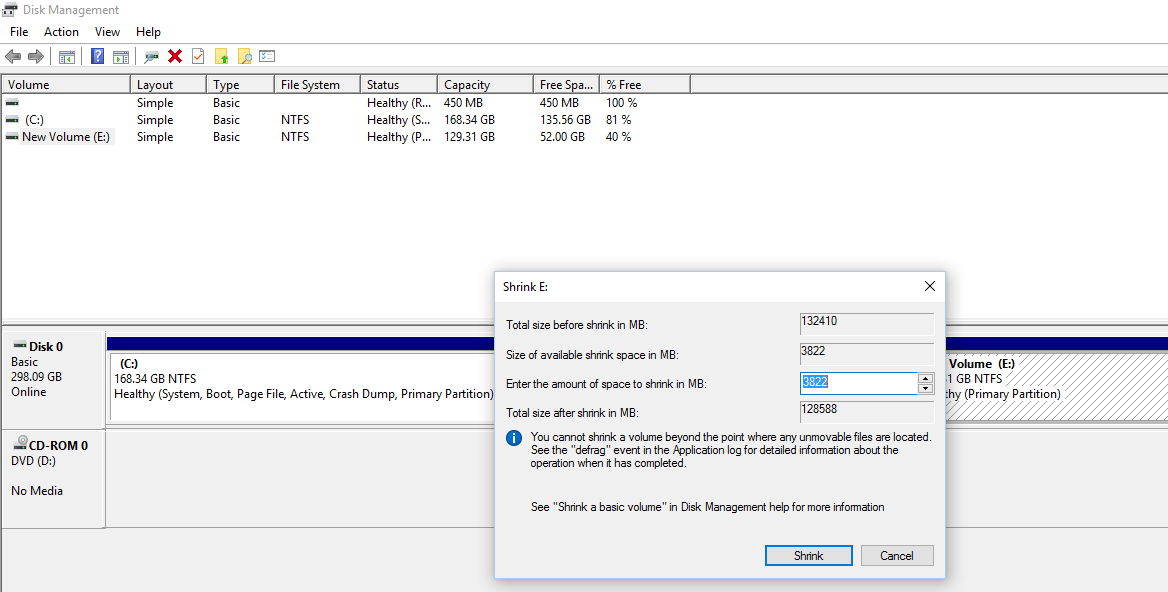
- Specify the Desired Space: Enter the space you wish to allocate for the new partition.
- Click “Shrink”: Confirm your selection to initiate the shrinking process.
Step 3: Creating a New Partition
Once you’ve successfully shrunk an existing partition, proceed to create a new one in the unallocated space:
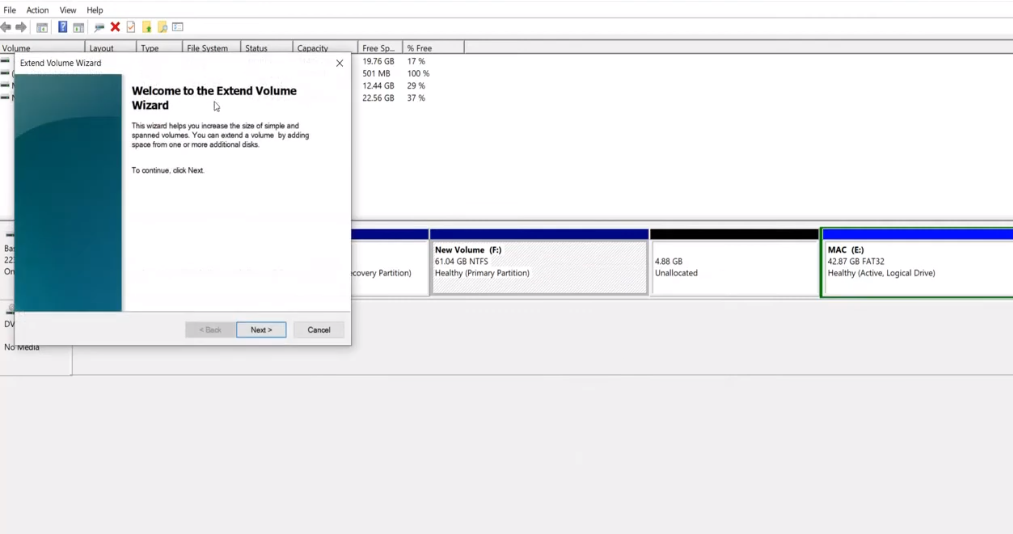
- Right-click on the Unallocated Space: This newly created space represents the foundation for your new partition.
- Select “New Simple Volume.”: The New Simple Volume wizard will guide you through the process.
- Follow the Wizard: Set the size, choose a drive letter, and specify the file system for the new partition following the prompts.
Step 4: Formatting the New Partition
After creating the new partition, it’s essential to format it for use. Here’s how:
- Right-click on the New Partition: Locate your newly created partition in the Disk Management window.
- Select “Format”: This action opens the formatting wizard.
- Choose File System and Allocation Unit Size: Select the desired file system (typically NTFS for Windows 10) and allocation unit size.
- Click “Next” and “Finish.”: Confirm your choices to initiate the formatting process.
Advanced Techniques and Best Practices
Maintaining Balanced Partitions
Balancing your partitions is essential for efficient disk space management. Avoid creating partitions that are too small or excessively large. Periodically assess your storage needs and resize partitions to maintain an optimal balance.
Regular Maintenance for Peak Performance
As your computing habits and data storage requirements evolve, so should your partitioning strategy. Regularly check your disk partitions and resize them as needed. This proactive approach ensures that your system runs smoothly and efficiently.
Risks associated with Re-partitioning in Windows 10
Data Loss: One of the primary concerns when re-partitioning is the potential for data loss. Any time you modify partitions on your hard drive, there is a risk that data stored on those partitions may become inaccessible or corrupted.
Partition Errors: During the re-partitioning process, errors can occur. These errors might manifest as partition table corruption, file system errors, or bad sectors on the disk. Such issues can lead to data loss or make your system unstable.
Accidental Deletion: It’s possible to delete a partition during the re-partitioning process accidentally. A mistaken click or incorrect selection can result in the loss of an entire partition and its contents.
System Instability: Re-partitioning can lead to system instability if not performed correctly. Changes to the partition structure may affect the boot configuration, leading to boot errors or system crashes.
Incomplete Re-partitioning: If the re-partitioning process is interrupted or incomplete correctly, it can leave your hard drive unstable. Unallocated space or partially modified partitions can cause data loss and make your system unpredictable.
Compatibility Issues: Compatibility issues may arise when re-partitioning for a dual-boot configuration or to accommodate a different operating system. Different OSes may have specific requirements or limitations that can affect the functionality of your computer.
Complexity for Inexperienced Users: Re-partitioning can be complex, especially for inexperienced users. Making incorrect decisions during the process can lead to undesirable outcomes.
Conclusion
Re-partitioning your hard drive in Windows 10 is fundamental for optimizing your computer’s performance and ensuring effective data management. By following the comprehensive guide and best practices outlined in this article, you can make the most out of this process while safeguarding your data.
FAQs
1. Is re-partitioning safe for my data?

Yes, re-partitioning is generally safe if done correctly. However, it’s essential to back up your data before making any changes to minimize the risk of data loss.
2. Can I re-partition my system drive?
Yes, you can re-partition your system drive, but it’s a more complex process that requires advanced knowledge. It’s recommended for experienced users.
3. What file system should I choose when formatting a new partition?
For Windows 10, NTFS is the recommended file system for most users. It offers better security and performance features.
4. How often should I check and resize my partitions?
Regularly check your partitions, especially if you frequently add or remove data. Consider resizing them when they start running low on space to maintain optimal performance.
5. Can I undo a partition if I change my mind?
Once you’ve applied changes and created partitions, undoing the partitioning process without data loss is challenging. Always proceed with caution and back up your data to minimize risks
