
USB Secure, developed by NewSoftwares.net, provides a powerful and portable solution for protecting your sensitive data on any USB flash drive, memory card, or external storage device. By encrypting your data with a password, it ensures your files remain secure even if your drive is lost or stolen.
Steps to Use USB Secure for Complete USB Security
To use USB Secure, You need to download and Install USB Secure. A complete guide and detailed steps are appended below on usage of USB Secure
Part 1: Downloading USB Secure
Step 1: Download the USB Secure Installer
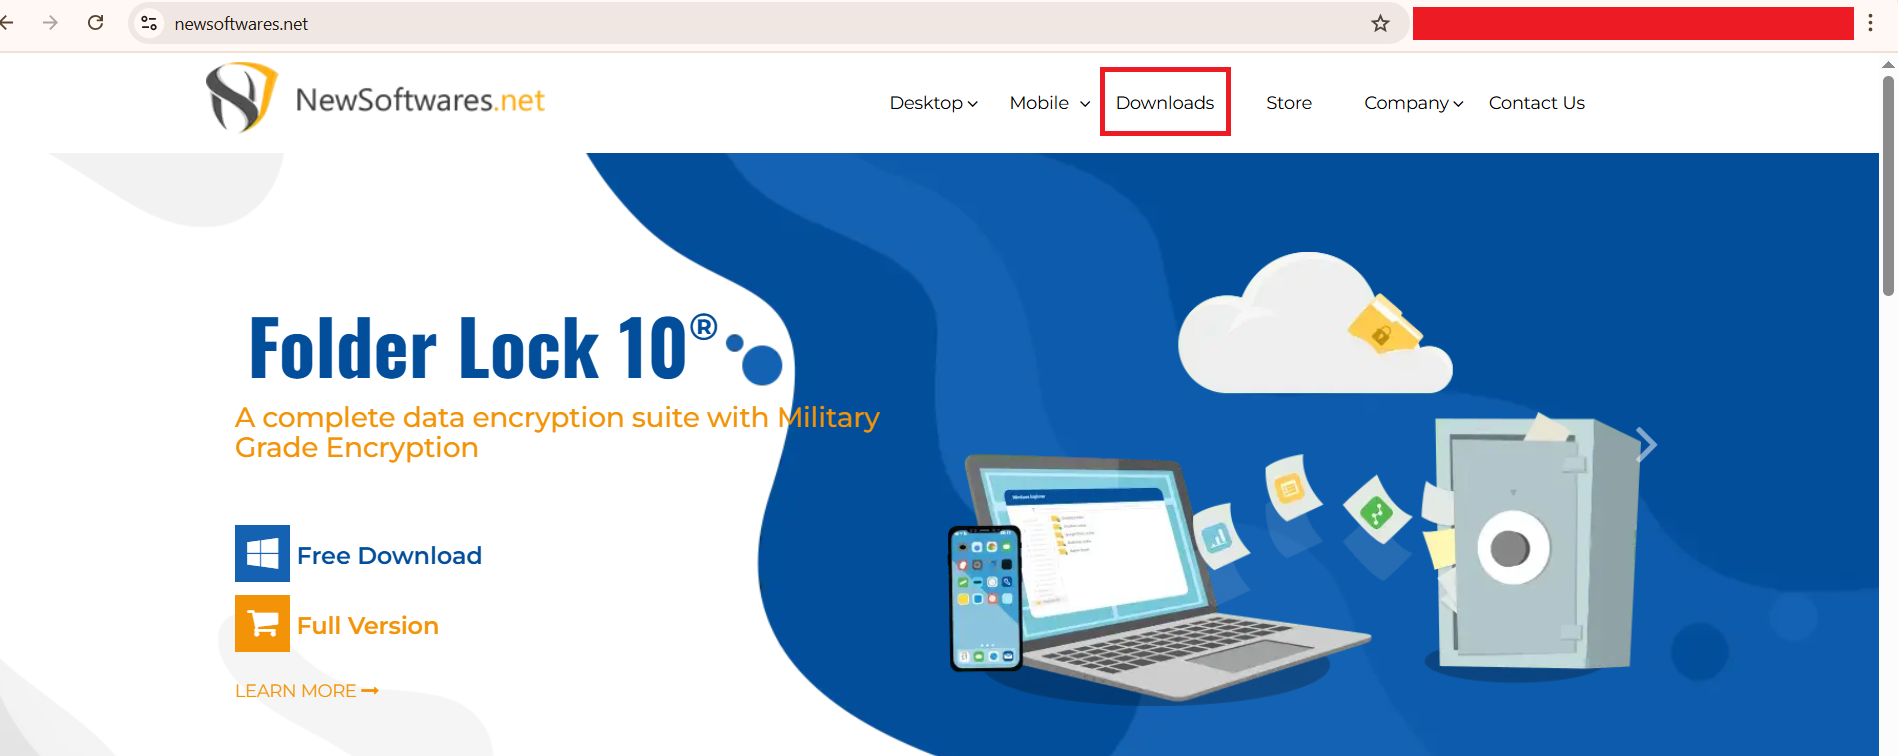
- Navigate to the NewSoftwares.net website and go to the "Downloads" section.
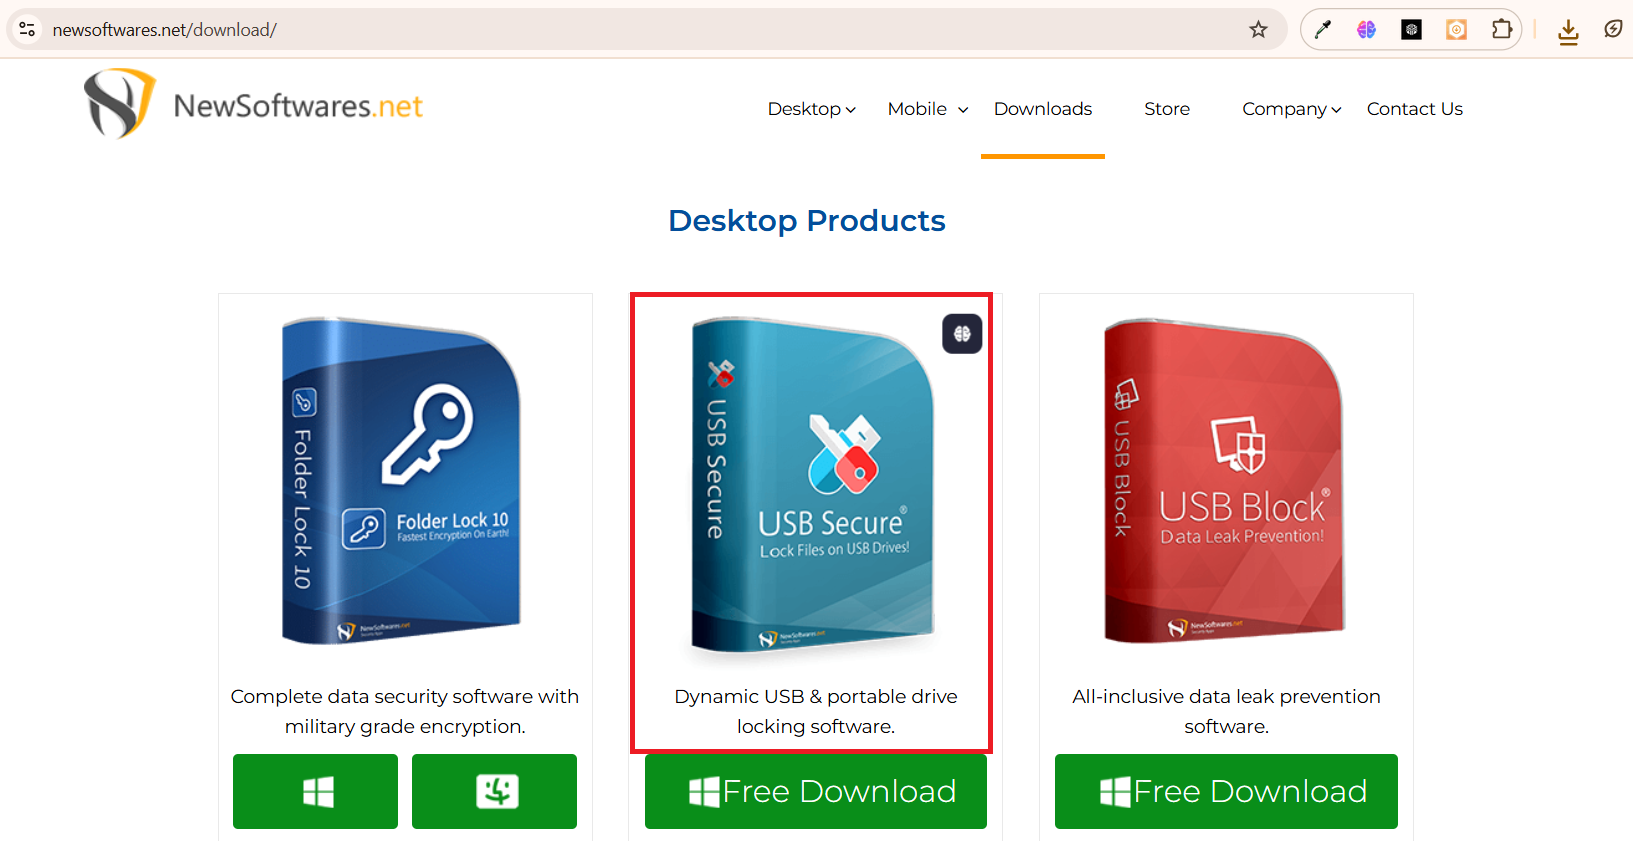
- Find "USB Secure"
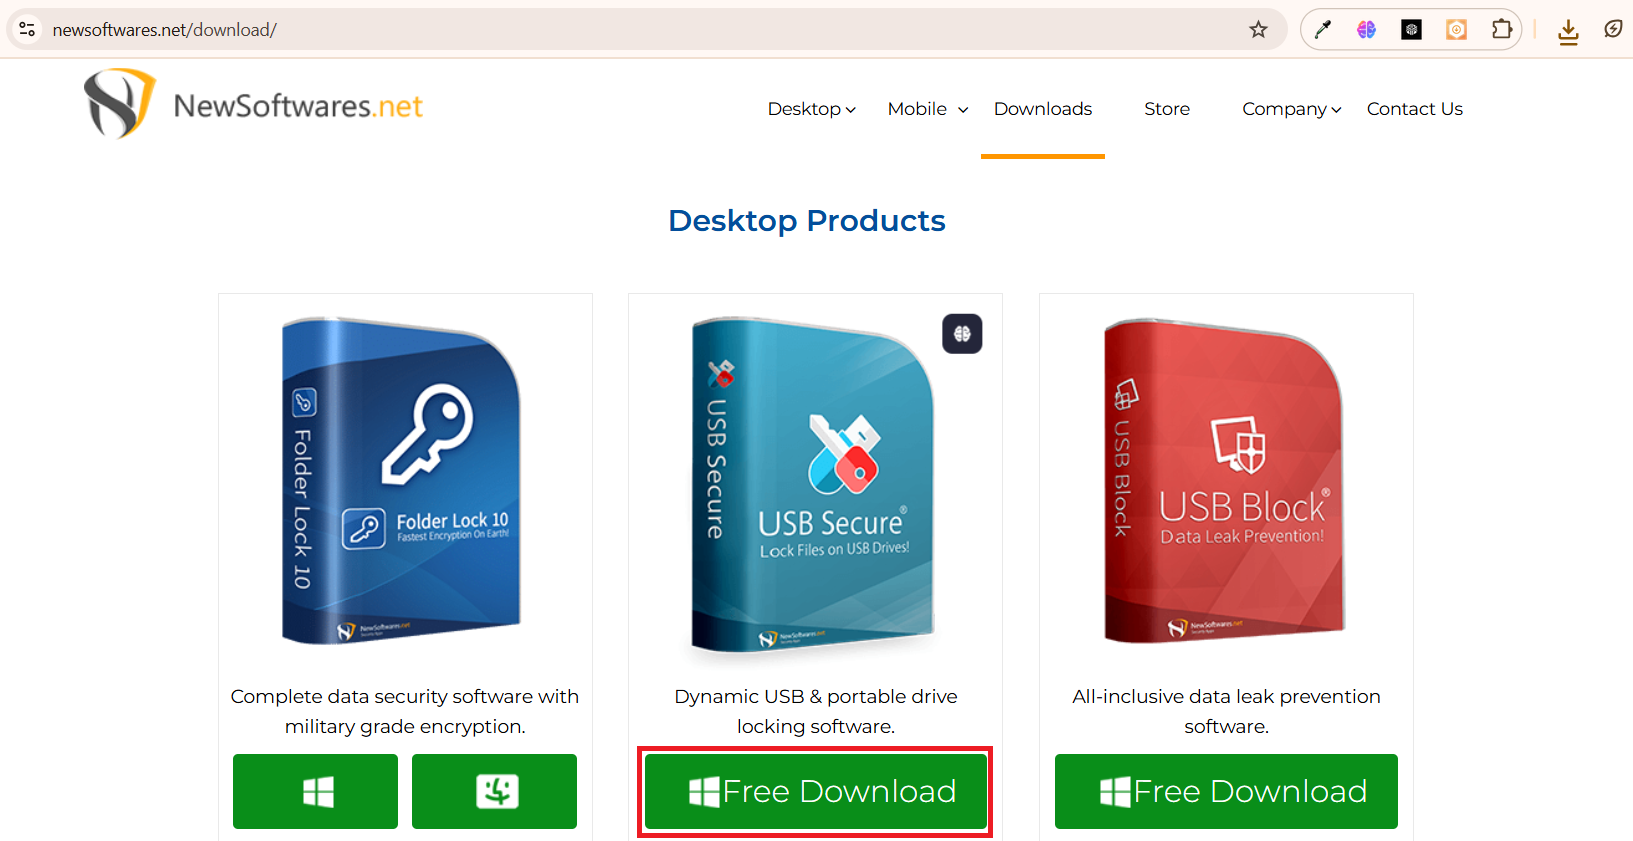
- Click on the "Free Download" button.
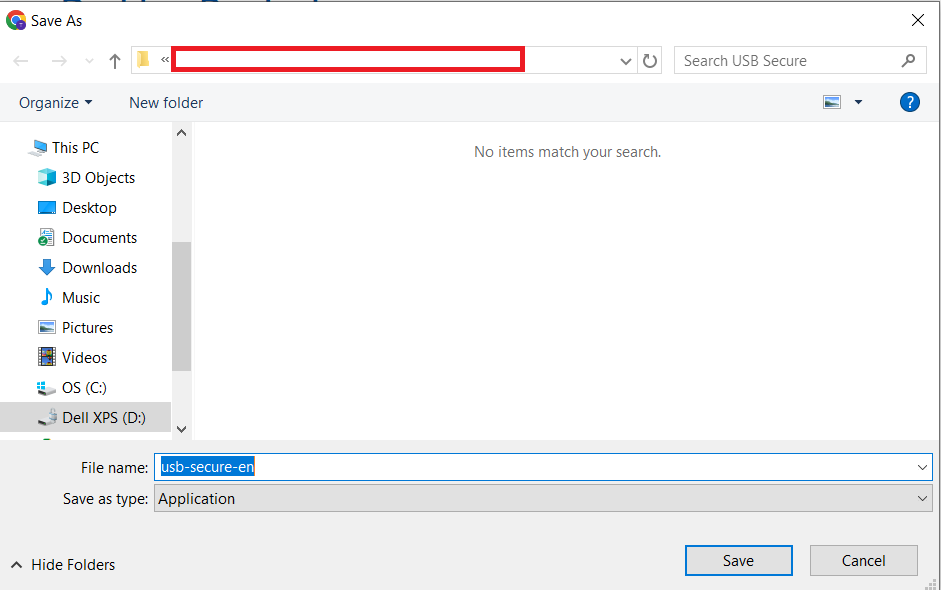
Step 2: Save the File to Your PC
- When prompted by your browser, choose a location on your computer (like your desktop or downloads folder) to save the
usb-secure-en.exefile.
- Your browser will begin downloading the
usb-secure-en.exeinstaller file.
Part 2: Installing USB Secure on Your USB Drive
Step 1: Plug in Your USB Drive
- Before proceeding, plug in the USB drive or portable storage device you wish to protect into your computer.
Step 2: Launch the Installer
- Go to the Menu Bar: Upon completion of the download, Open your browser's download list (e.g., by pressing
Ctrl+Jin Chrome or Firefox) from the browser menu.
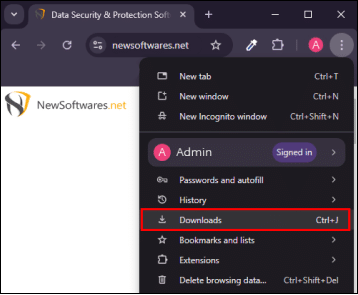
- Find the downloaded
usb-secure-en.exefile and click on it to open the installation wizard.

- The wizard will first display the "End-User Agreement."
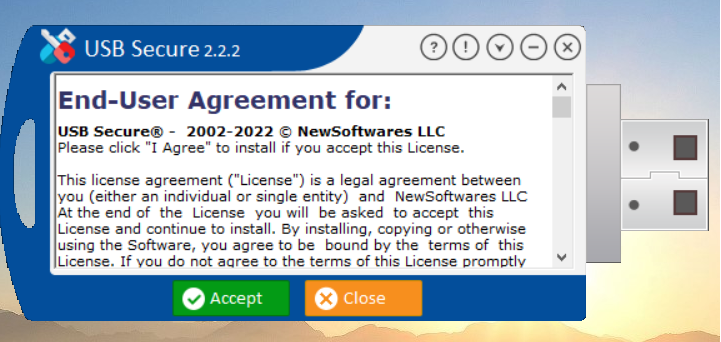
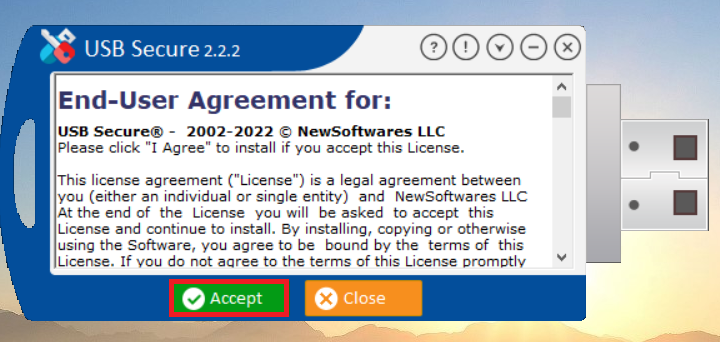
- Click "Accept" to agree to the terms and continue.
Step 3: Select Your Portable Drive
- USB Secure will now detect and display a list of all connected portable drives.
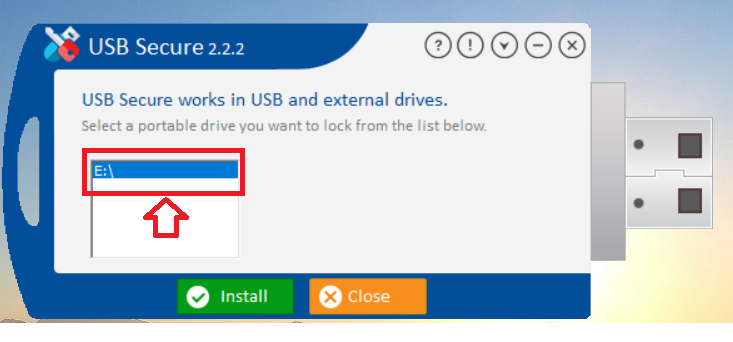
- Select your desired USB drive from the list.
- Click "Install" to begin installing the program directly onto that drive.
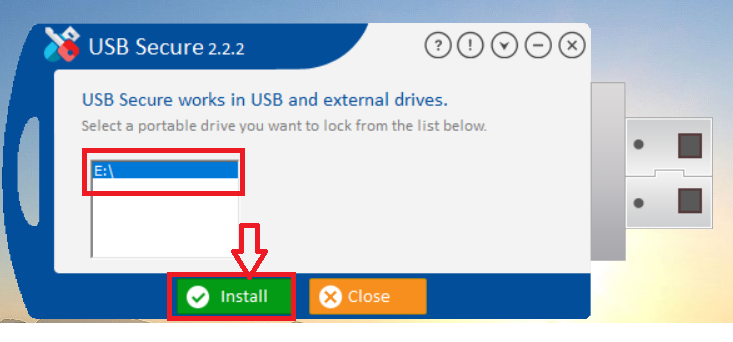
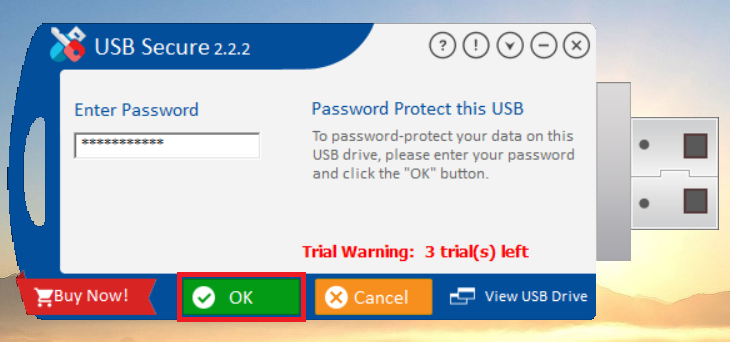
Step 4: Set a Password for the USB Drive
After installation, your browser will open a Thank You message as shown in below screenshot
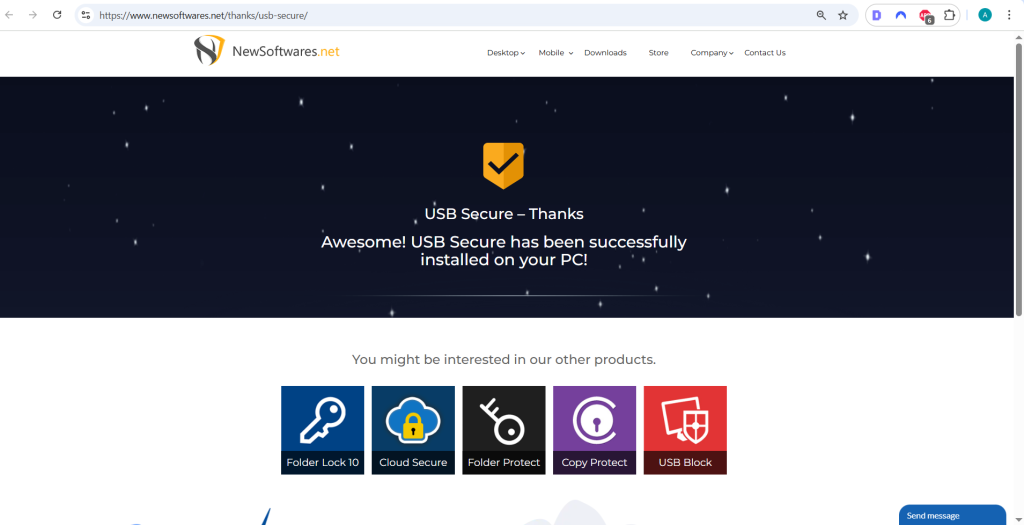
- At the same time, USB Secure prompt will appear asking you to set a password for the drive.
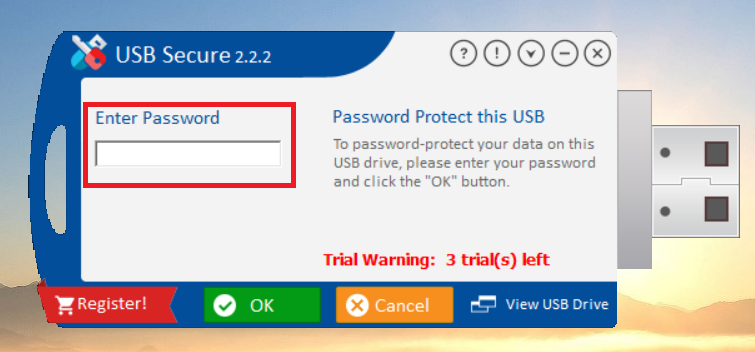
- Enter a strong, easy-to-remember password in the "Enter Password" field.
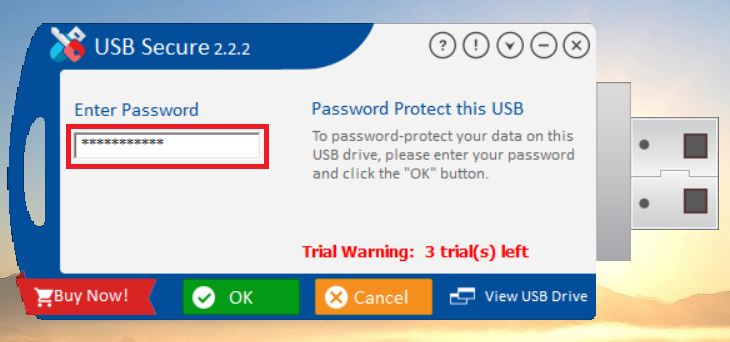
- Click "OK" to finalize the password setup.
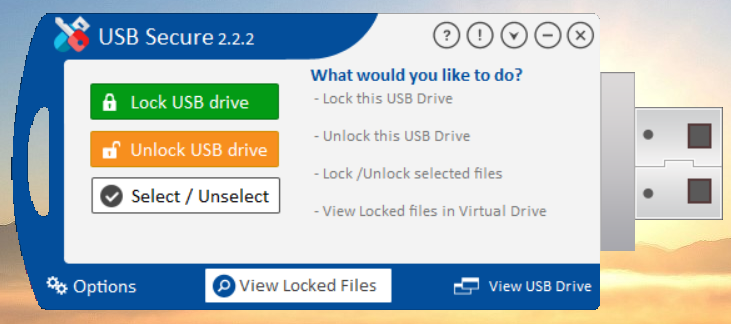
- Success! USB Secure is now installed on your USB drive, and this is the home screen where you can manage your drive's security.
Part 3: Using USB Secure
Accessing the USB Secure Application
Step 1: Open Your USB Drive
- Plug in the USB drive with USB Secure installed into your computer.
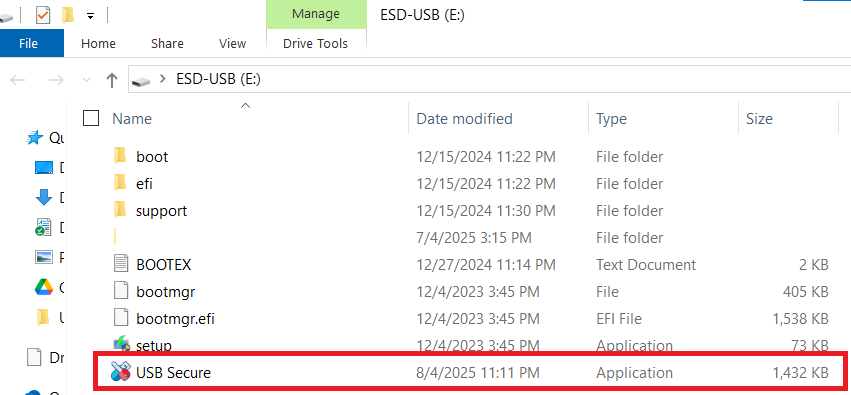
- Navigate to the drive in your computer's File Explorer.

Step 2: Launch the USB Secure Application
- On your USB drive, locate and double-click the
USB Secureapplication file to open the software's home screen.
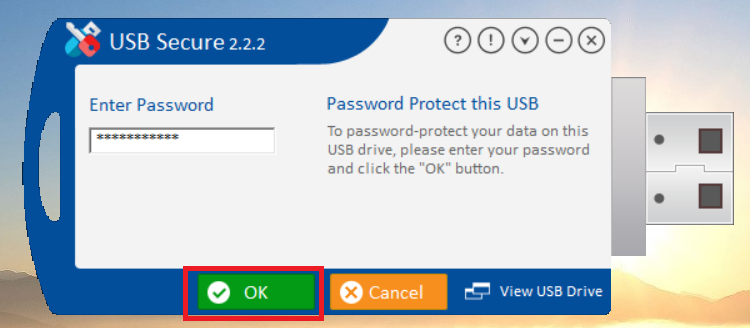
- Enter the password, You have set during the installation process.
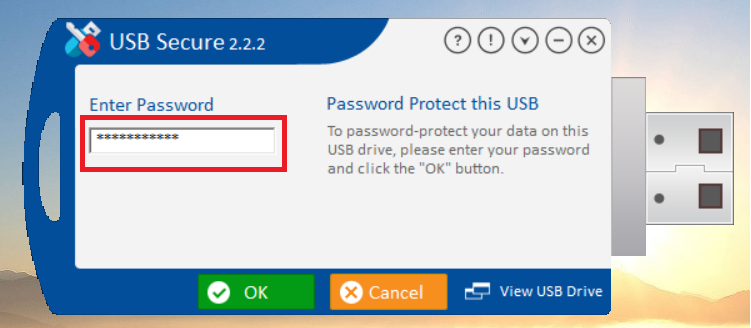
- Click Ok.
Locking and Unlocking Your Drive
Lock Your USB Drive
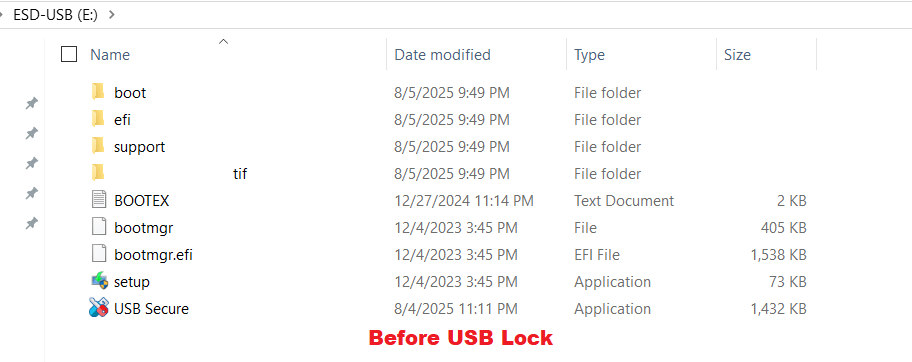
- Before locking USB drive, your USB will have all your files displayed as shown in below screenshot.
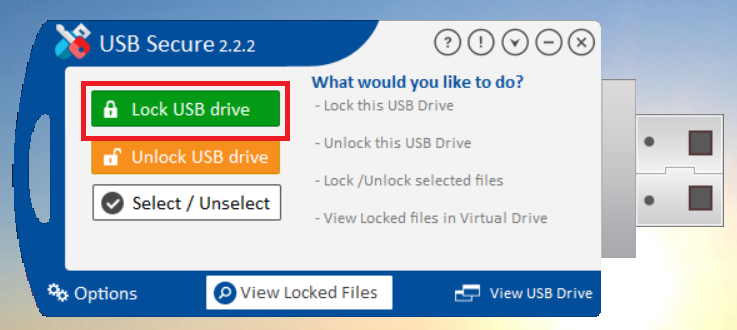
- To lock your files, On the USB Secure home screen, click the green "Lock USB drive" button.
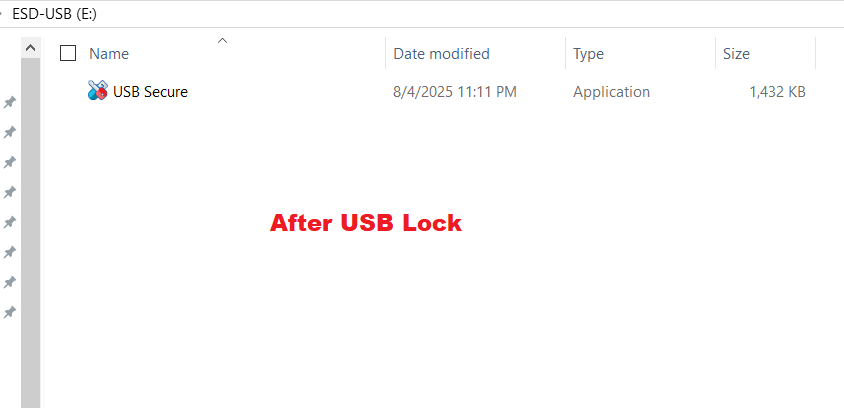
- Upon clicking the lock button, the entire drive is secured. All files are automatically encrypted and hidden, ensuring they are password-protected. The visual change on your drive is immediate: as shown in the screenshot below, all your files will disappear, leaving only the USB Secure application, which you will use to unlock and access them.
Unlock Your USB Drive
- To access your files again, open the USB Secure application on your USB drive.
- Click the orange "Unlock USB drive" button.
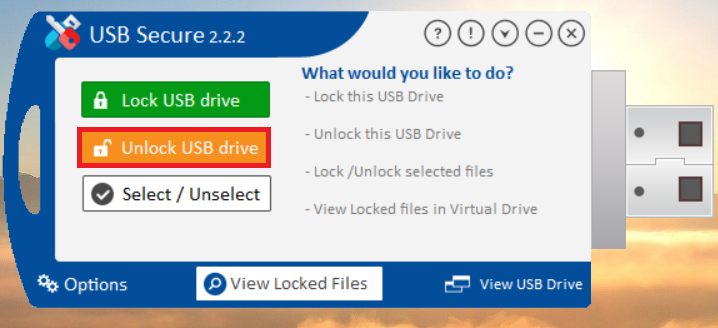
- A prompt will appear asking for your password. Enter the password you set during the installation. Your files will then be unlocked and become visible again.

- You have successfully unlocked your files as show in screenshot

Managing Files and Viewing Locked Data
Select Specific Files to Lock/Unlock
- If you only want to lock or unlock certain files, click the "Select / Unselect" button.
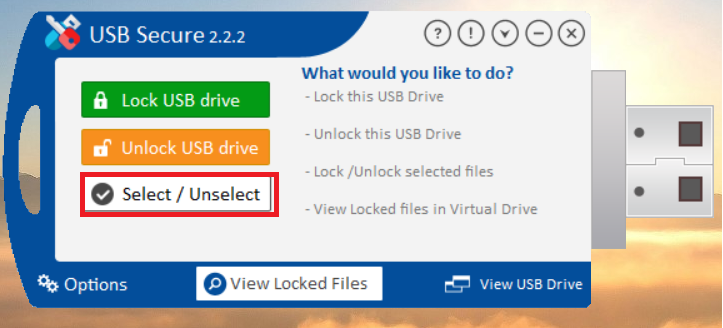
- This will display list of files available in your USB drive.
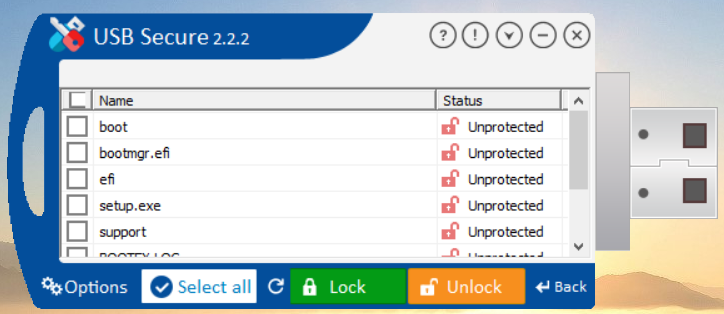
- You can select / unselect your files by clicking check box. Selected files will be locked whereas unchecked files will remain unhided.
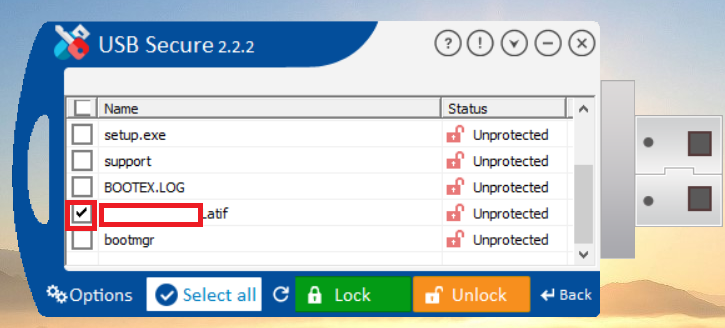
- Click on Lock to lock your files
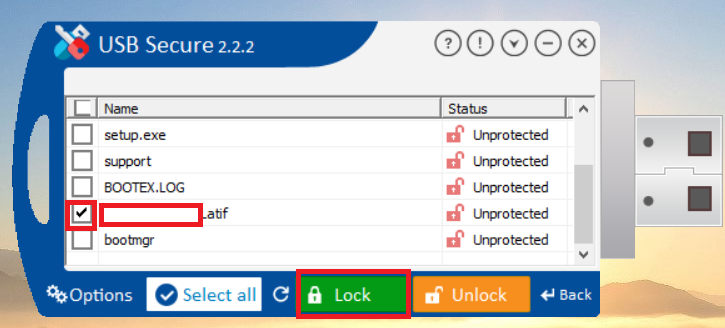
- The selected file is protected as shown in below screenshot.
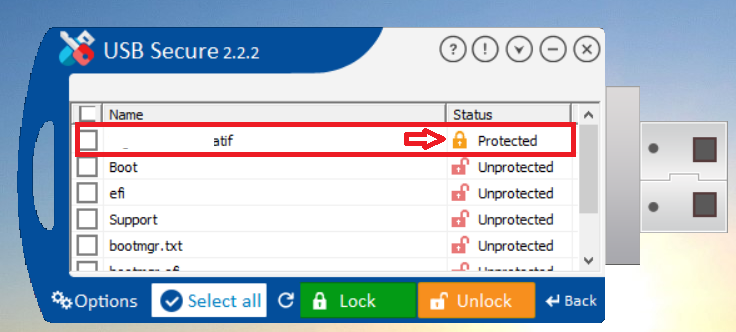
- To unlock the protected folder, select the protected file
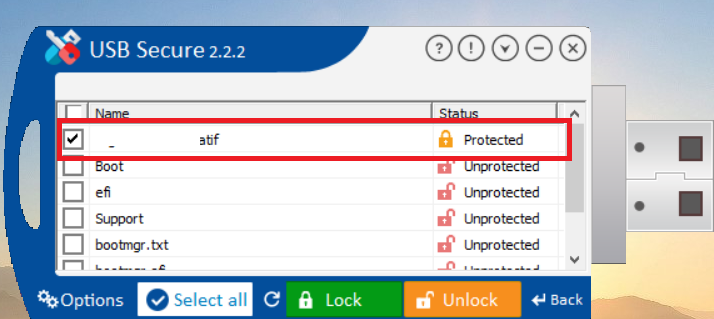
- Click on Unlock to unlock your files
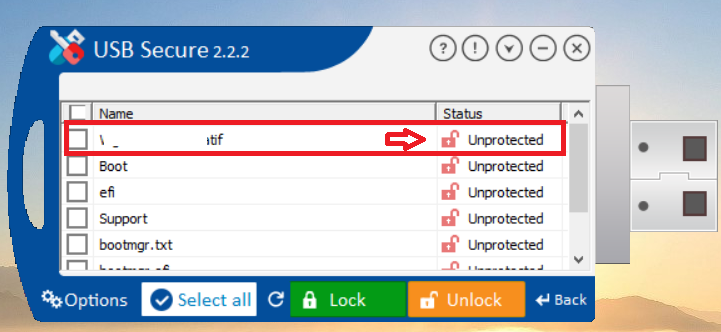
View Locked Files in a Virtual Drive
Even when your drive is locked, you can still view your files without fully unlocking them.
- Consider below screenshot that displays your protected file .

- Lets begin viewing this locked file by using USB Secure feature "View Locked Files". On the main screen of USB Secure application , look for "View Locked Files" and click on it.
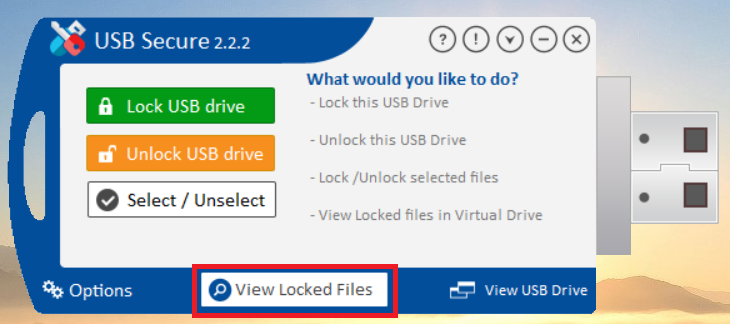
- Click on the "View Locked Files" button to open a virtual drive where you can safely see and interact with your protected data as shown in screenshot.

By following this guide, you can confidently and easily use USB Secure to protect and manage your portable data, giving you the peace of mind that your sensitive information is always safe.

