
USB Secure, from NewSoftwares.net, gives you granular control over how the application interacts with your system. By choosing to show the Autoplay list, you can have a visible prompt that includes USB Secure every time you plug in your drive, giving you a clear choice of actions. This guide will show you how to enable this specific setting.
Purpose and Benefits
This feature's purpose is to add USB Secure as a visible option in the Windows Autoplay menu. The benefit for the user is that it provides a clear and customizable choice of actions every time they plug in their drive, without automatically executing the program. This allows for quick, conscious decisions on whether to lock, unlock, or simply view the drive's contents, providing a streamlined and controlled user experience.
Steps to Show the Autoplay List Containing USB Secure
Step 1: Open Your USB Drive and Launch USB Secure
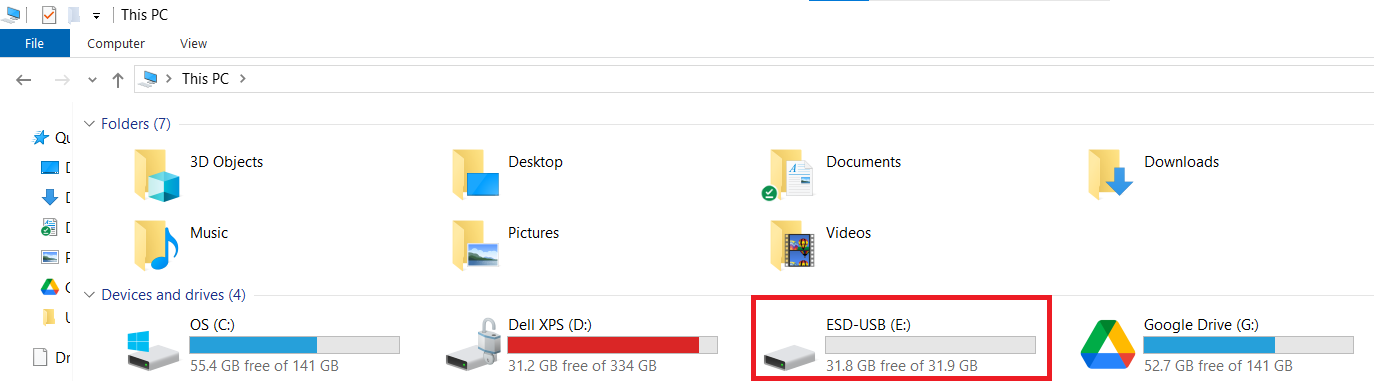
- Plug in the USB drive with USB Secure installed into your computer.
- Navigate to the drive in your computer's File Explorer.
Step 2: Launch the USB Secure Application
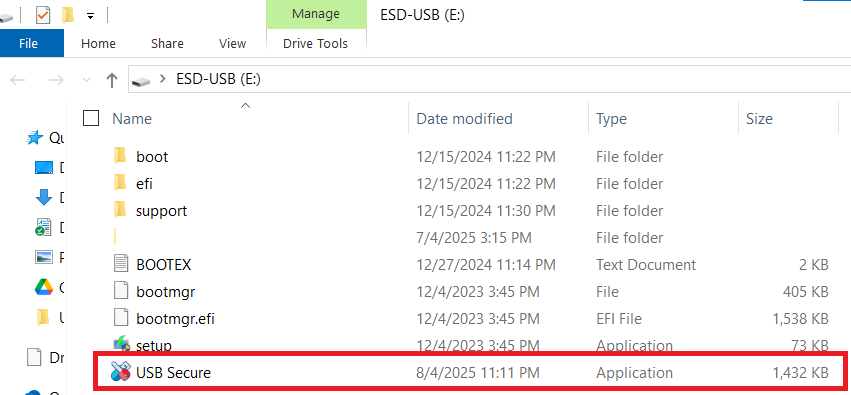
- On your USB drive, locate and double-click the
USB Secureapplication file to open the software's home screen.
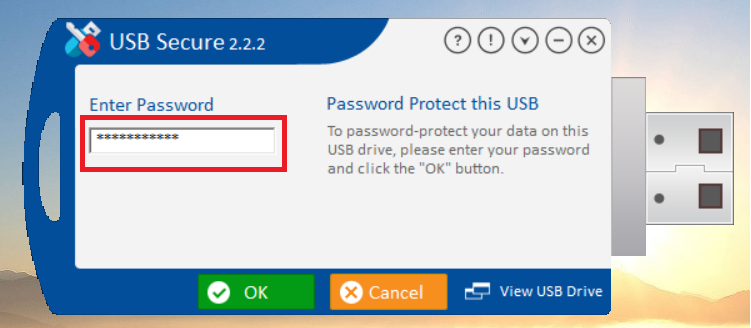
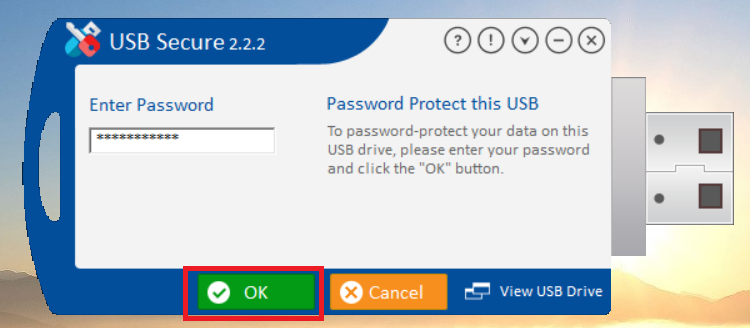
- Enter the password, You have set during the installation process.
- Click Ok.
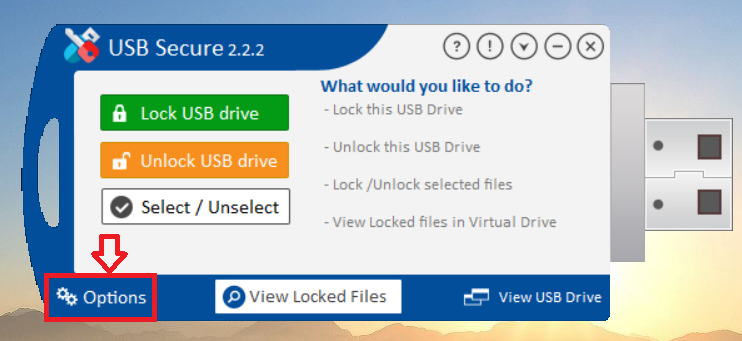
Step 3: Access the Options Menu
- On the USB Secure home screen, look for the "Options" button, which is typically found in the bottom-left corner.
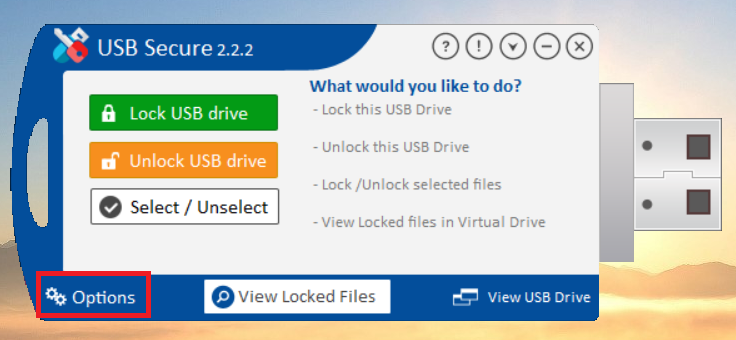
- Click on "Options" to open the settings menu.
- The settings menu will appear as shown below
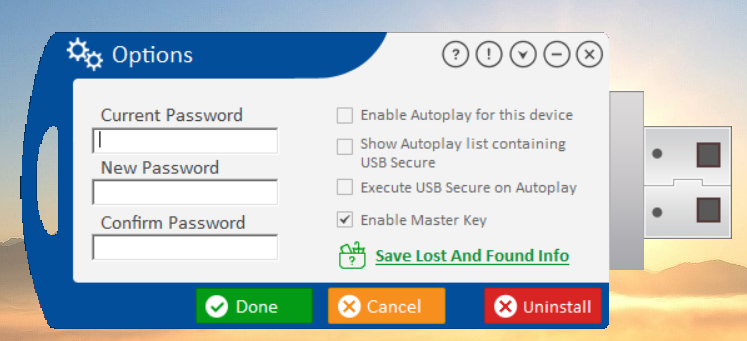
Step 4: Show the Autoplay List
- In the Options menu, find the checkbox labeled "Show Autoplay list containing USB Secure."
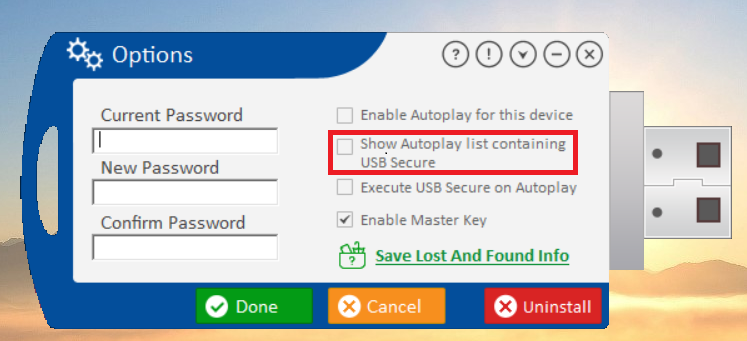
- Check this box to ensure that when your drive is plugged in, USB Secure is listed as an option in the Windows Autoplay menu.
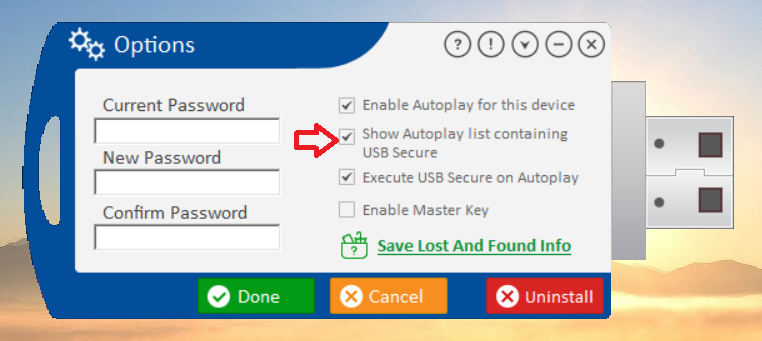
Step 5: Save Your Changes
- Click the green "Done" button to apply the new setting.
By configuring this setting, you have taken control of your portable drive's security workflow. This option ensures that USB Secure is always presented as a clear and accessible choice when you connect your drive. You can now make a conscious, streamlined decision to manage your files, providing a highly customizable and secure user experience that perfectly fits your needs.