
USB Secure, from NewSoftwares.net, offers an additional layer of security by allowing you to create a Master Key. This feature is useful for administrators or users who need a robust secondary method to access the drive. This guide will show you how to enable and set up the Master Key.
Purpose and Benefits
The primary purpose of the Master Key is to provide an alternate, universal password for accessing the drive. The key benefit is redundancy and administrative control. It ensures that even if a regular password is lost or forgotten, the drive can still be accessed with the Master Key. This is a critical security safeguard that prevents permanent data loss.
Steps to Enable the Master Key in USB Secure
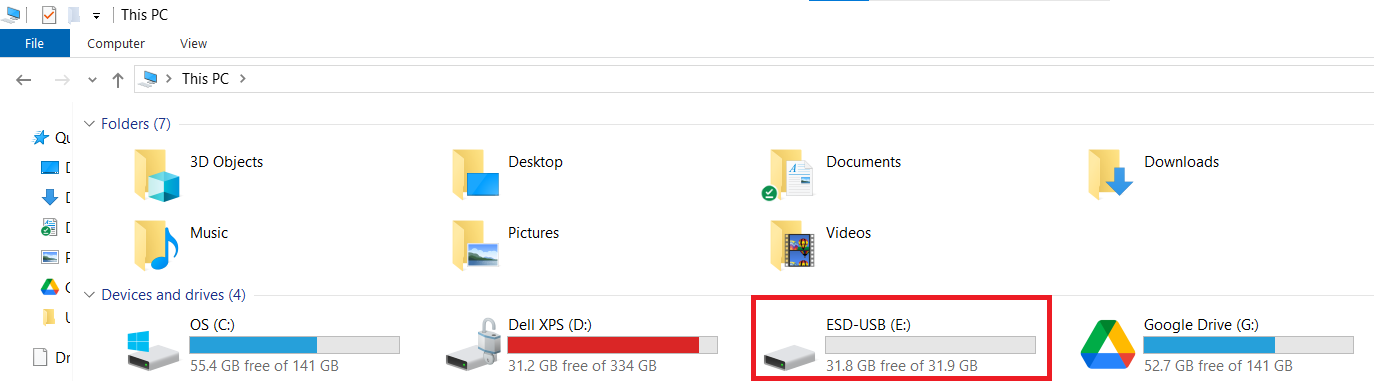
Step 1: Open Your USB Drive and Launch USB Secure
- Plug in the USB drive with USB Secure installed into your computer.
- Navigate to the drive in your computer's File Explorer.
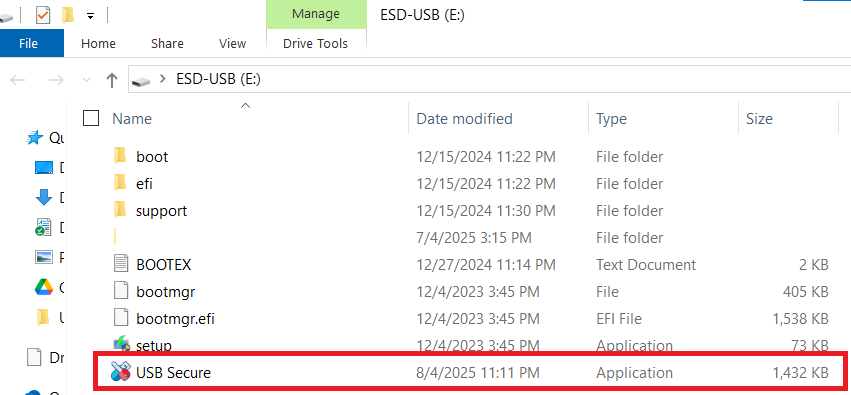
Step 2: Launch the USB Secure Application
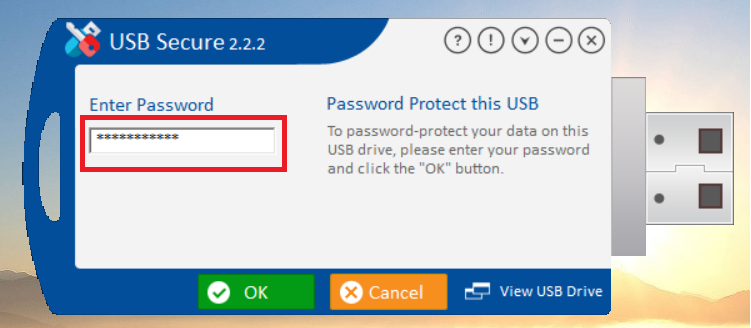
- On your USB drive, locate and double-click the USB Secure application file to open the software's home screen.
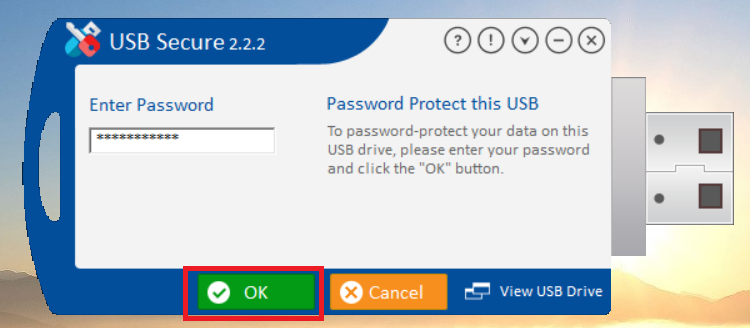
- Enter the password, You have set during the installation process.
- Click Ok.
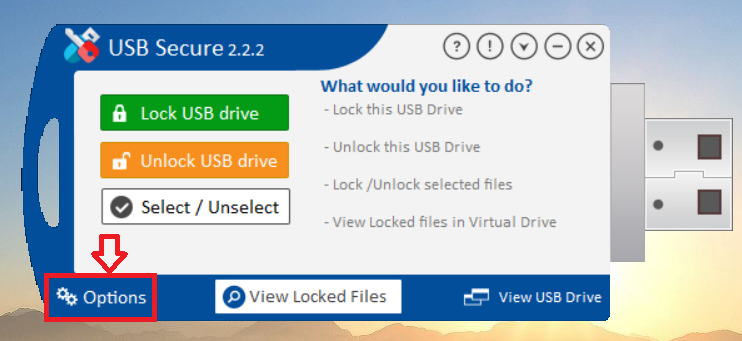
Step 3: Access the Options Menu
- On the USB Secure home screen, look for the "Options" button, which is typically found in the bottom-left corner.
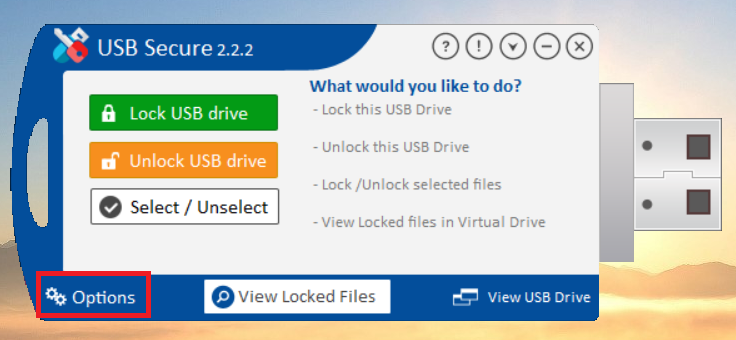
- Click on "Options" to open the settings menu.
- The settings menu will appear as shown below
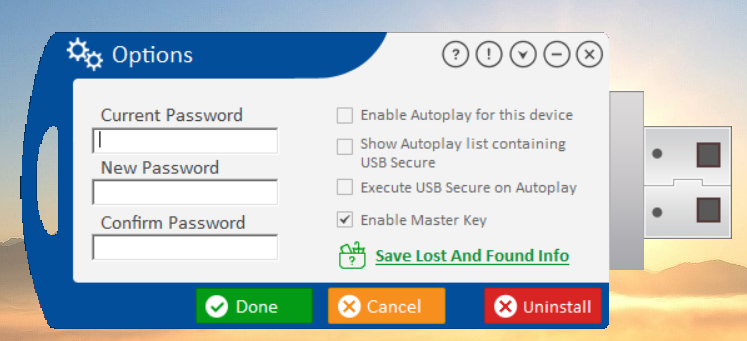
Step 4: Enable and Set the Master Key
- In the Options menu, find the checkbox labeled "Enable Master Key."
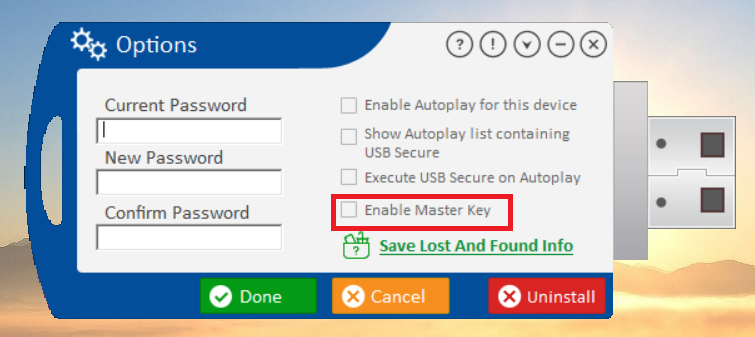
- Check this box to ensure that your "Enable Master Key." is enabled
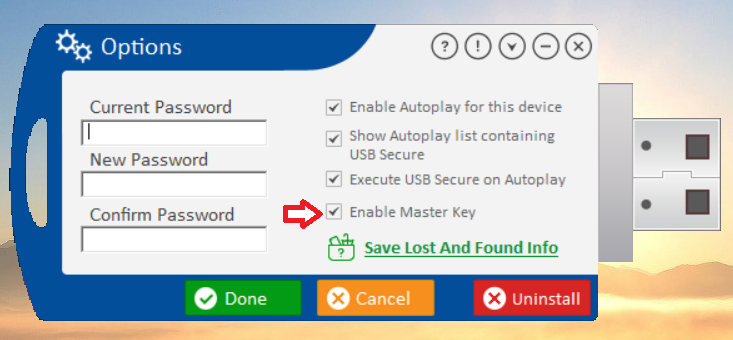
Step 5: Save Your Changes
- Click the green "Done" button to apply the new setting.
With the Master Key now enabled, you have fortified your drive with a powerful redundancy. This critical security safeguard provides a reliable secondary method for accessing your data, ensuring that your valuable files are protected from permanent loss due to a forgotten or compromised password. You can now manage your drive with the ultimate peace of mind.