
USB Secure, from NewSoftwares.net, provides a thoughtful "Lost And Found" feature that can help you recover your drive if it is ever misplaced. By adding your owner details, you create a point of contact for anyone who finds your drive, without compromising the security of your protected data. This guide will show you how to add your owner details.
Purpose and Benefits
The purpose of the "Owner Details" feature is to provide contact information in the event of a lost drive. The primary benefit is the increased chance of recovery. It allows a finder to easily contact the owner, while ensuring that all protected data remains completely secure and inaccessible to them without the correct password.
Steps to Add Owner Details in USB Secure
Step 1: Open Your USB Drive and Launch USB Secure
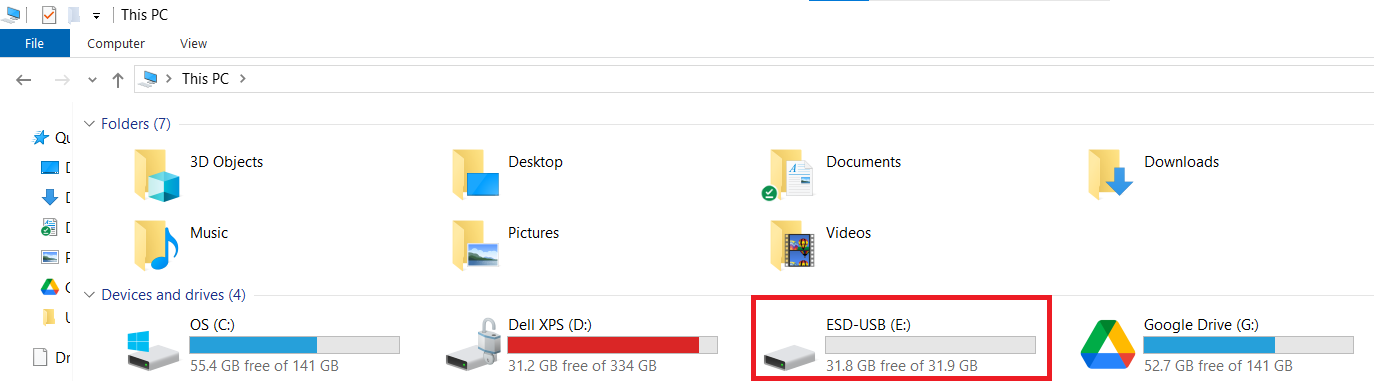
- Plug in the USB drive with USB Secure installed into your computer.
- Navigate to the drive in your computer's File Explorer.
Step 2: Launch the USB Secure Application
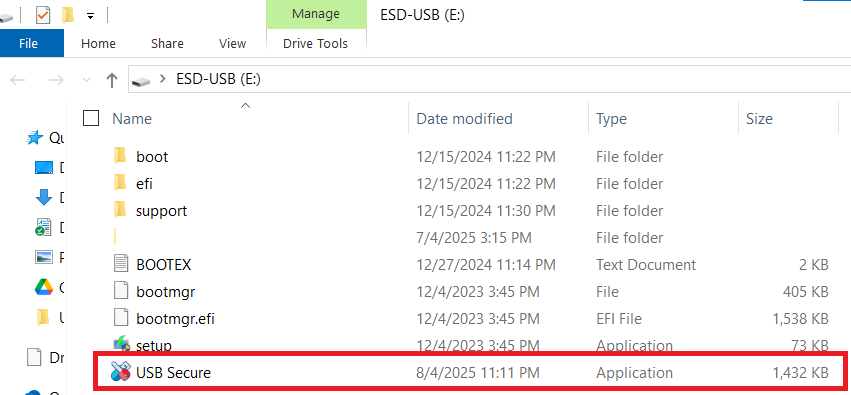
- On your USB drive, locate and double-click the
USB Secureapplication file to open the software's home screen.
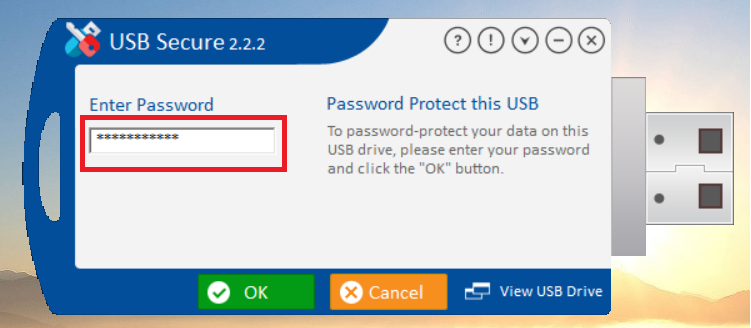
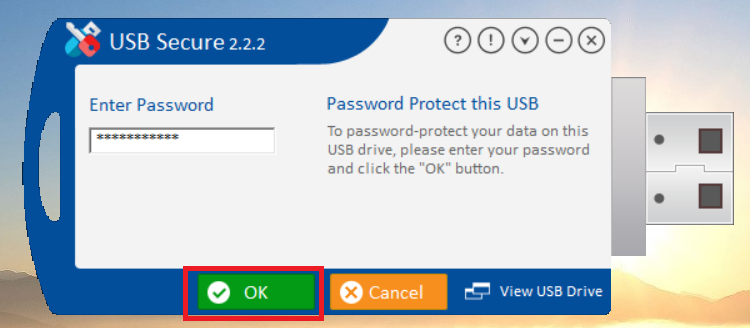
- Enter the password, You have set during the installation process.
- Click Ok.
Step 3: Access the Options Menu
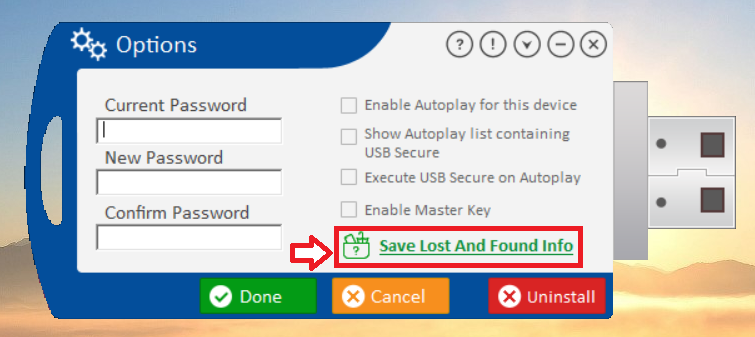
- On the USB Secure home screen, look for the "Options" button, which is typically found in the bottom-left corner.
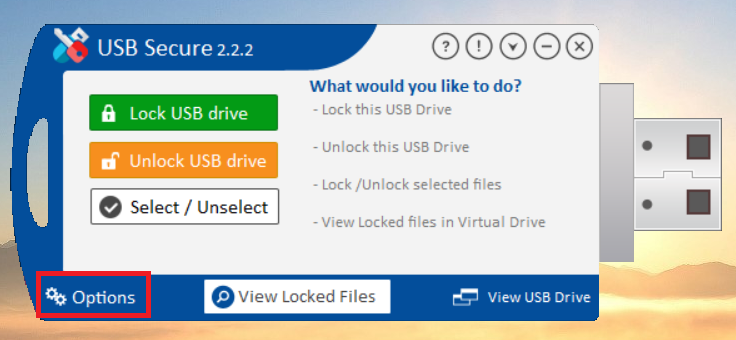
- Click on "Options" to open the settings menu.
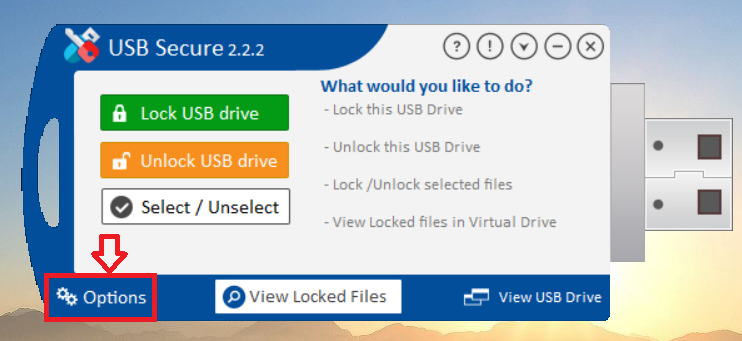
- The settings menu will appear as shown below
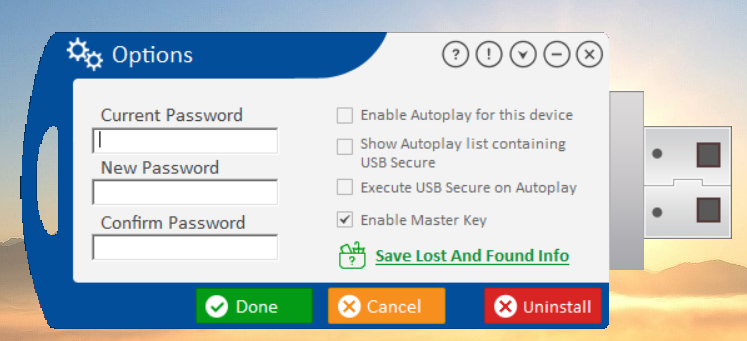
Step 4: Add Owner Details
- In the Options menu, look for the green link labeled "Save Lost And Found Info."
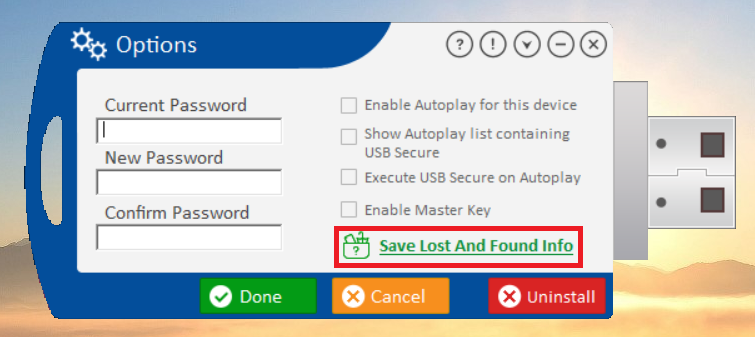
- Click this link "Save Lost And Found Info."
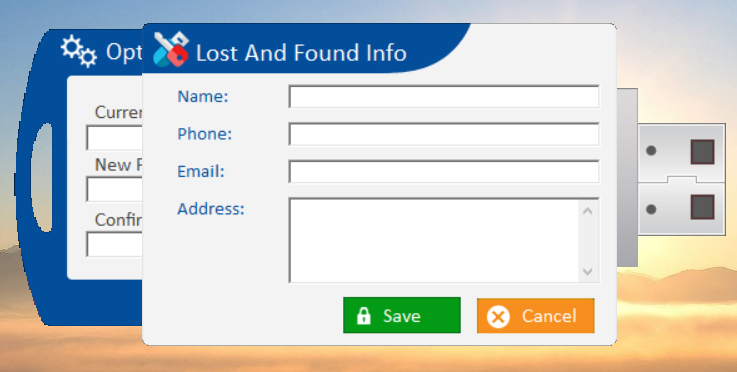
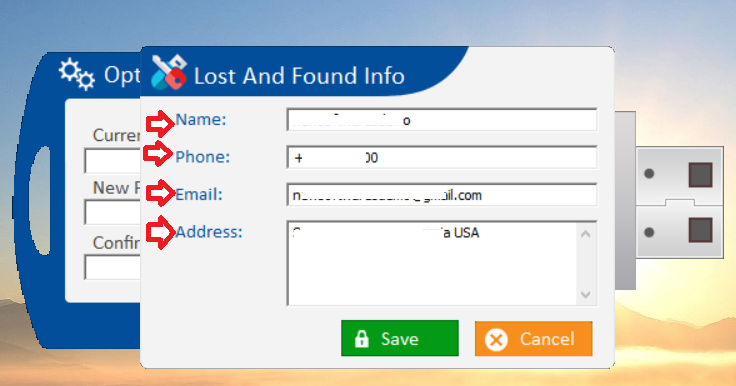
- Enter owner details (Name, Phone no, Email and Address).
Step 5: Save Your Changes
- Click the green "Done" button to apply the new setting.
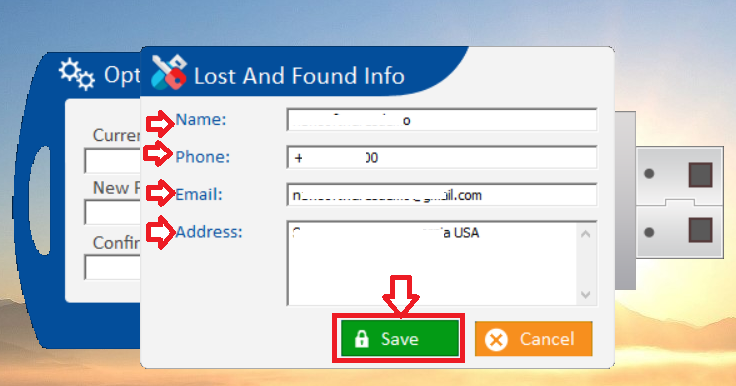
- Important Note: Your protected data will still remain secure and cannot be accessed without entering the correct password.
By adding your owner details, you've taken a thoughtful and proactive step to protect your drive. This feature gives you a vital safety net, creating a secure way for a finder to contact you while ensuring your protected data remains completely inaccessible. This blend of security and practicality provides a high degree of confidence that your valuable information is safe and potentially recoverable.