To password protect a Zip file in Windows 10, first, gather the files or folders you want to include in the archive. Then, select them, right-click, and choose “Send to” > “Compressed (zipped) folder.” Rename the Zip file if needed. Double-click to open it, click “File,” and select “Add a password.” Set a strong password and optionally encrypt file names. Confirm the password and save. Now, your Zip file is protected. To open it, you’ll need to enter the password.
Recommended Tool to Password Protect a Zip File in Windows 10: https://www.newsoftwares.net/folderlock/
Why Password Protect a Zip File?

- Data Security: Password-protecting a Zip file adds more security to your data. Even if someone gains access to the Zip file, they won’t be able to open it without the correct password.
- Confidentiality: If you deal with sensitive information like financial records, personal documents, or business reports, password protection ensures that only authorized individuals can view the contents.
- Data Compression: Zip files secure and compress your data, saving storage space and making it easier to transfer over the internet or via email.
- Organized Storage: Zip files allow you to consolidate multiple files or folders into a single archive, helping you organize your data.
How To Password Protect A Zip File In Windows 10?
To password-protect a zip file in Windows 10, you can use the built-in compression utility, which allows you to create a password-protected zip archive.

Step 1: Prepare Your Files
Before creating a password-protected Zip file, gather the files or folders you want to include in the archive. Ensure you have all the data you want to protect in one location.
Step 2: Select the Files/Folders
Navigate to the location of your files or folders. Press the ‘Ctrl’ key to select multiple items while clicking on each file or folder. Alternatively, to select all items in a folder, press ‘Ctrl + A.’
Step 3: Right-click and Choose ‘Send to’
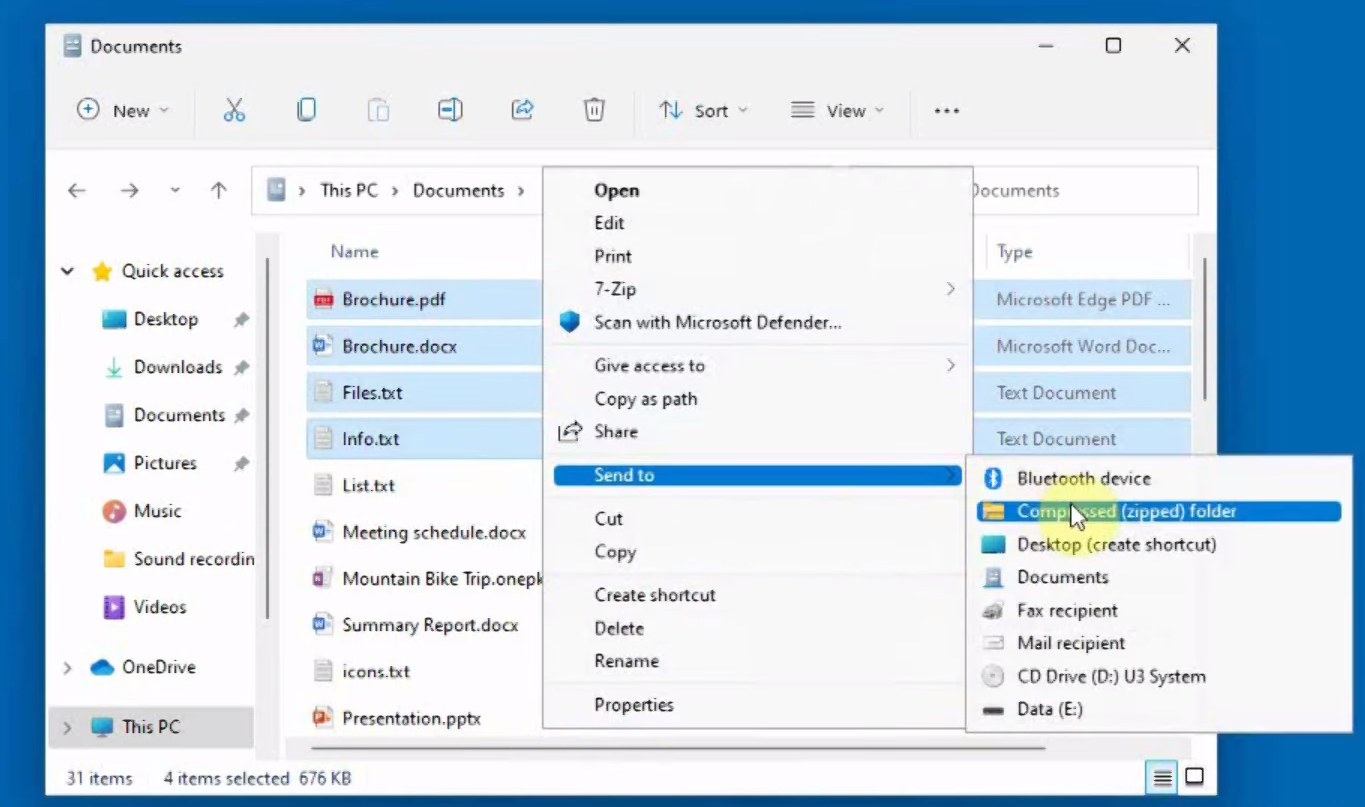
After selecting your files or folders, right-click on one of them. In the context menu that appears, hover over the ‘Send to’ option, and a submenu will appear.
Step 4: Select ‘Compressed (zipped) folder’
From the ‘Send to’ submenu, select ‘Compressed (zipped) folder.’ This action will create a new Zip file in the same location as your original files or folders.
Step 5: Rename the Zip File
By default, Windows will name the Zip file based on the first file or folder you selected. To rename the Zip file, right-click on it, select ‘Rename,’ and enter the desired name.
Step 6: Open the Zip File
Double-click on the newly created Zip file to open it. Windows will display the contents of the Zip archive, which should contain your selected files or folders.
Step 7: Add a Password
To password protect this Zip file, click the ‘File’ menu at the window’s top-left corner and select ‘Add a password.
Step 8: Set a Password
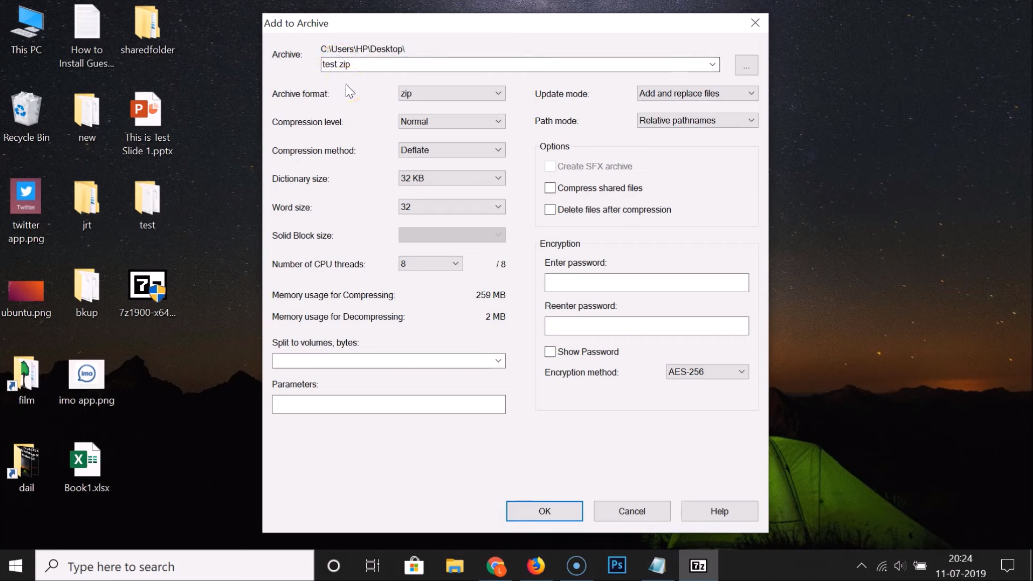
In the ‘Add a password’ window, you will be prompted to enter and confirm a password for the Zip file. Choose a unique password that combines letters, numbers, and special characters for added security.
Step 9: Optional Encryption
You have the option to encrypt the file names inside the Zip archive. While this is not mandatory, it can enhance the security of your data. To enable this option, check the box that says ‘Encrypt file names,’ then click ‘OK.’
Step 10: Confirm the Password
Windows will ask you to confirm the password by entering it again. Ensure you type it correctly, as this will be the key to accessing the Zip file’s contents. Once confirmed, click ‘OK.’
Step 11: Save and Close
Your Zip file is now password-protected. Save and close the archive. You will notice a small padlock icon on the Zip file, indicating password-protected.
Step 12: Test the Zip File
To ensure that the password protection is working as intended, try to open the Zip file. Windows will prompt you to enter the password before granting access to the contents.
Tips for a Secure Password:
- Use a combination of upper and lower-case letters.
- Include numbers and special characters (!, @, #, $, etc.).
- Avoid using easily guessable information like birthdays or names.
- Make it at least eight characters long.
Conclusion:
Password-protecting a Zip file in Windows 10 is a simple yet effective way to safeguard sensitive data. By following the steps outlined in this guide, you can ensure that only authorized individuals can access the contents of your Zip archives. Remember to use strong passwords and consider encrypting file names for an added layer of security. With these precautions, you can confidently share or store your important files while maintaining confidentiality.
FAQs
Can I password-protect a Zip file without using third-party software in Windows 10?

Yes, Windows 10 has built-in functionality to create password-protected Zip files. You don’t need third-party software for this task.
How do I create a Zip file in Windows 10?
You can create a Zip file by selecting the files or folders you want to include, right-clicking, choosing ‘Send to,’ and selecting ‘Compressed (zipped) folder.’
What makes a strong password for a password-protected Zip file?
A strong password should be at least eight characters long and include a combination of upper and lower-case letters, numbers, and special characters. Avoid easily guessable information like birthdays or names.
Can I change the password of an existing password-protected Zip file?
No, Windows does not provide a built-in option to change the password of an existing Zip file. To change the password, you must create a new Zip file with the desired password and copy the contents from the old one.
What if I forget the password for a password-protected Zip file?
If you forget the password for a password-protected Zip file, there is usually no way to recover it. It’s crucial to keep the password in a secure place or use a password manager to avoid losing access to your files.
Are password-protected Zip files compatible with other operating systems?
Password-protected Zip files can be opened on various operating systems, including Windows, macOS, and Linux. However, opening them may vary slightly depending on the software used.
1 Is the software available for creating password-protected Zip files in Windows 10?
Windows 10 has built-in functionality to create password-protected Zip files, as the guide explains. However, there are also third-party Zip file compression tools available that offer additional features and options for encryption.
