
Folder Lock, developed by Newsoftwares.net, offers a powerful and secure solution for collaborating with others. By leveraging popular cloud services like Google Drive, Dropbox, and OneDrive, you can grant access to your encrypted files without ever compromising data security. This comprehensive overview will walk you through the entire process, providing detailed steps for both the sender and the recipient to ensure a seamless and secure collaboration experience.
Steps To Share Files With Others
Follow these steps to securely share your files
Prerequisite
- The person you are sharing files with must also have a registered Folder Lock account.
- For sharing of Google Drive Locker File, the receiptent must have and a Google Drive account.
- For sharing of OneDrive Locker File, the receiptent must have and a OneDrive account.
- For sharing of Dropbox Locker File,the receiptent must have and a Dropbox account.
Part 1: The Sender's Process: Setting Permissions and Sharing
Step 1: Accessing Share Tab And Giving Permissions
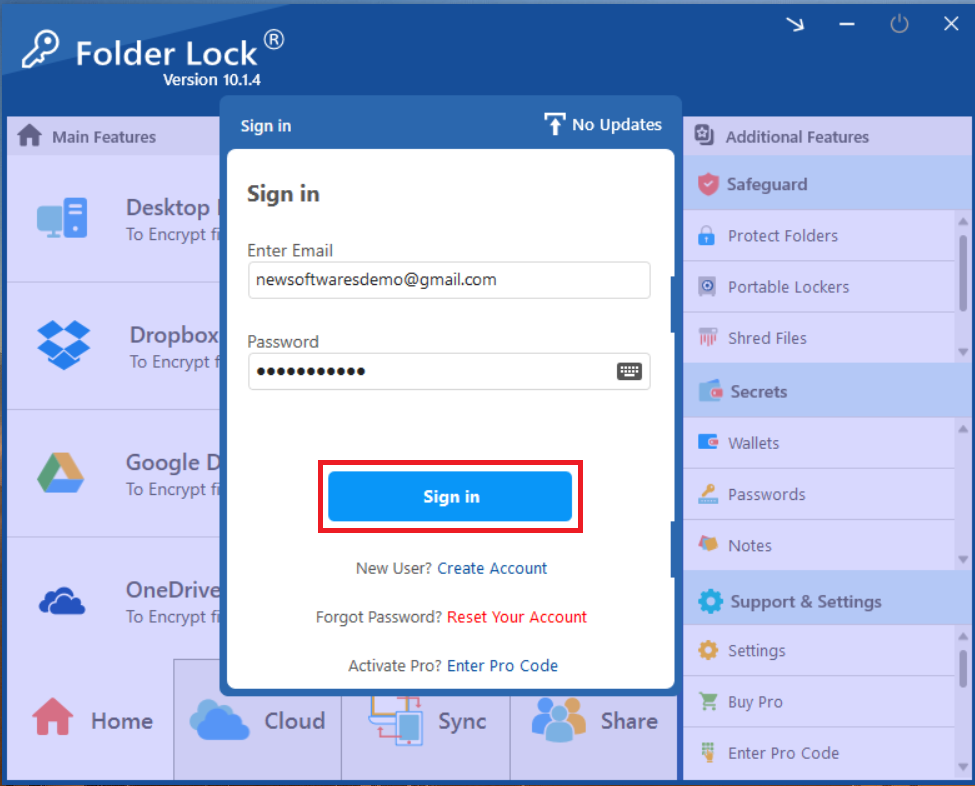
- Launch the Folder Lock application on your computer
- Enter your credential adn click "sign in".
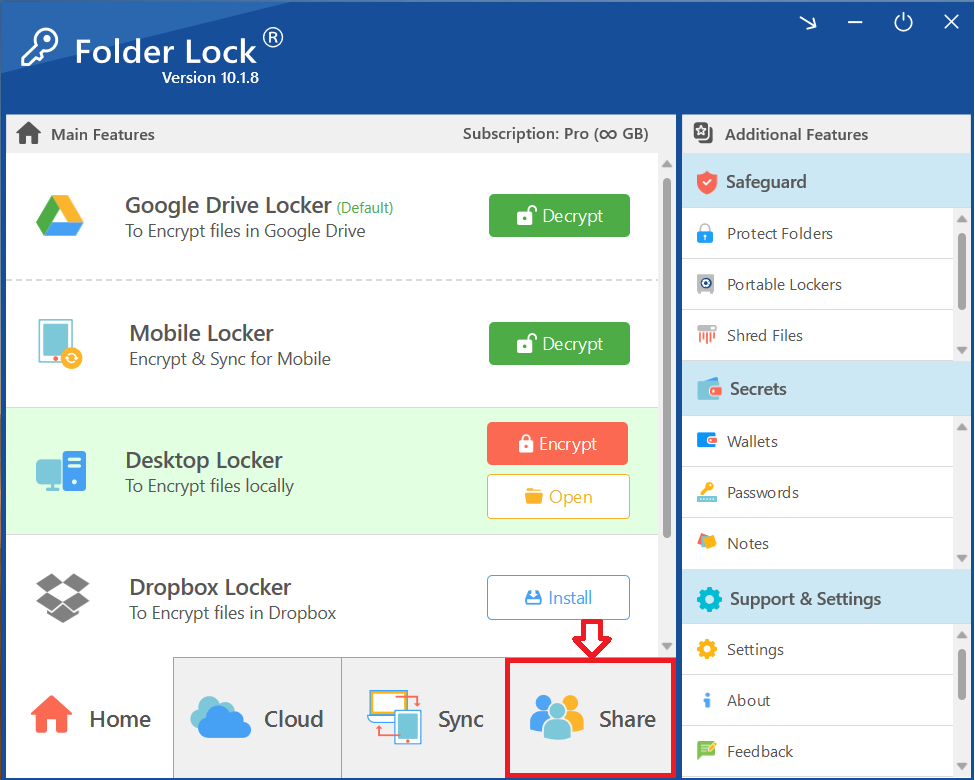
- Access the "Share" Tab. On the home screen, click the "Share" tab in the bottom-right corner.
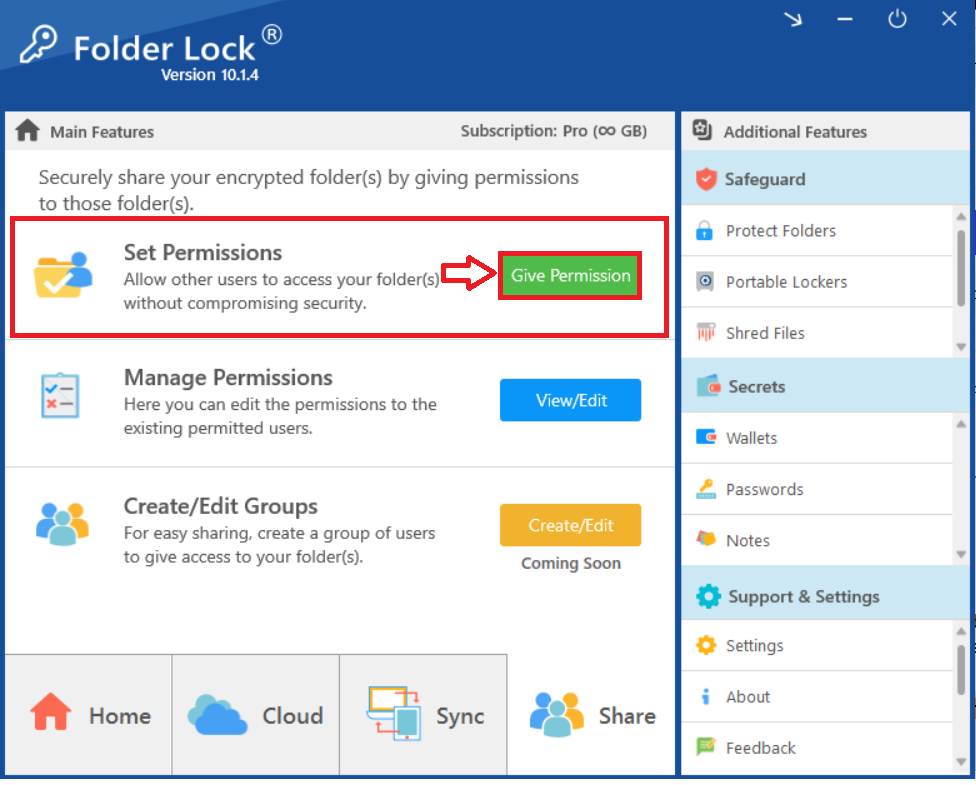
- The "Share" interface will appear. To begin, click the green "Give Permission" button under the "Set Permissions" section.
- Choose the Locker and Folder to Share. A "Choose Folder" window will appear, listing your available lockers.
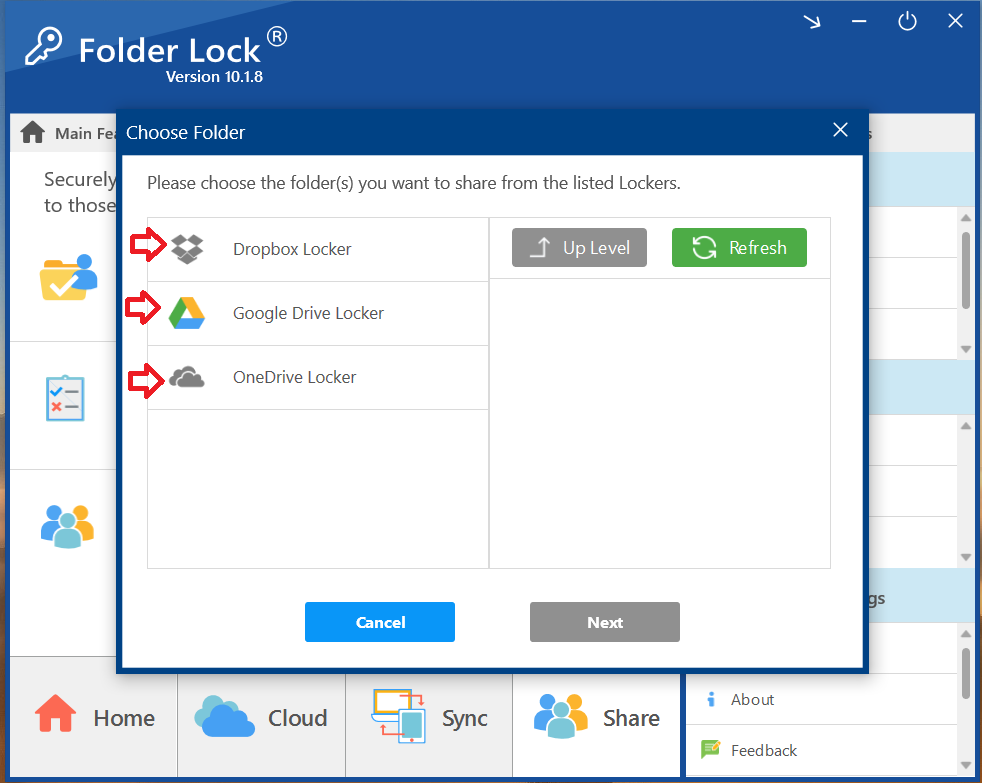
- Select the locker containing the files you want to share (e.g., "Google Drive Locker").
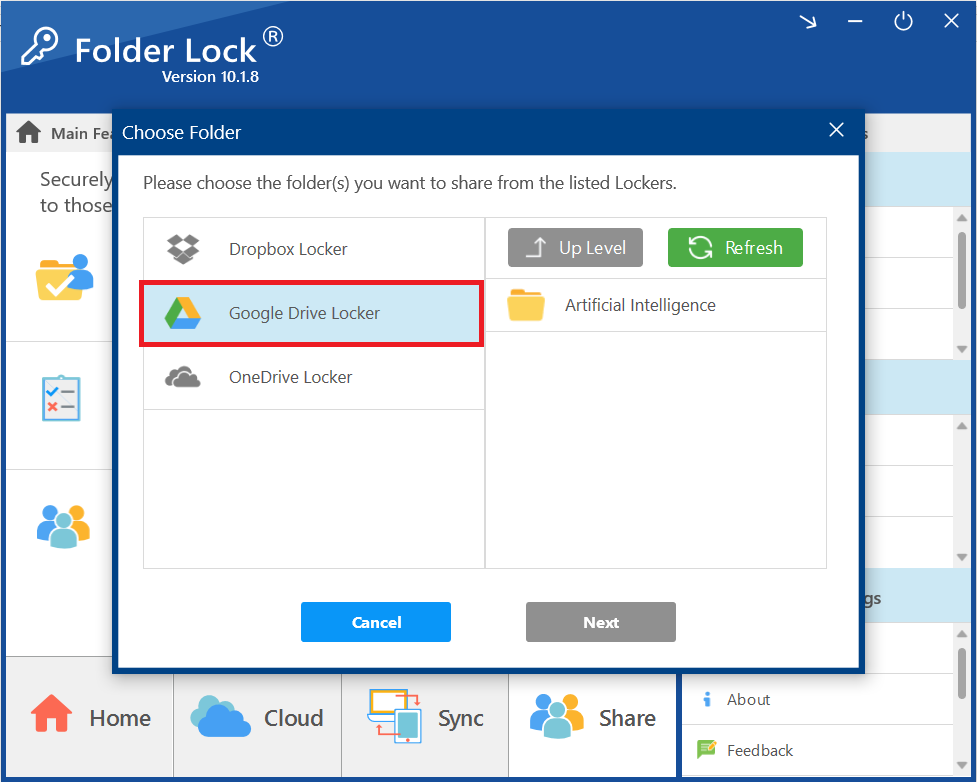
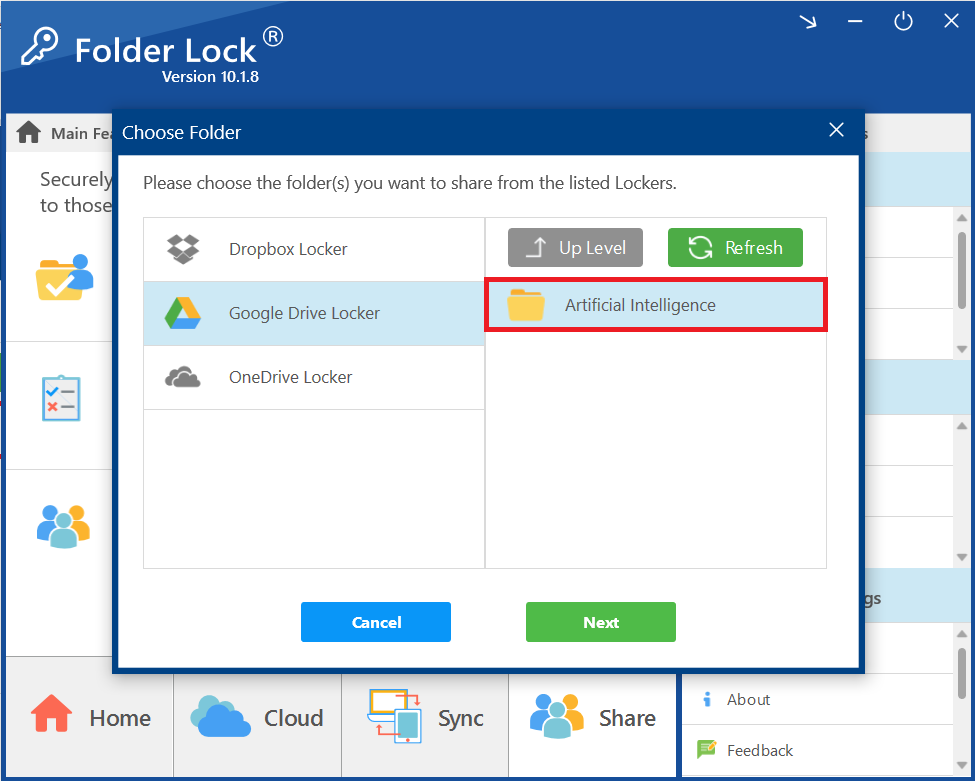
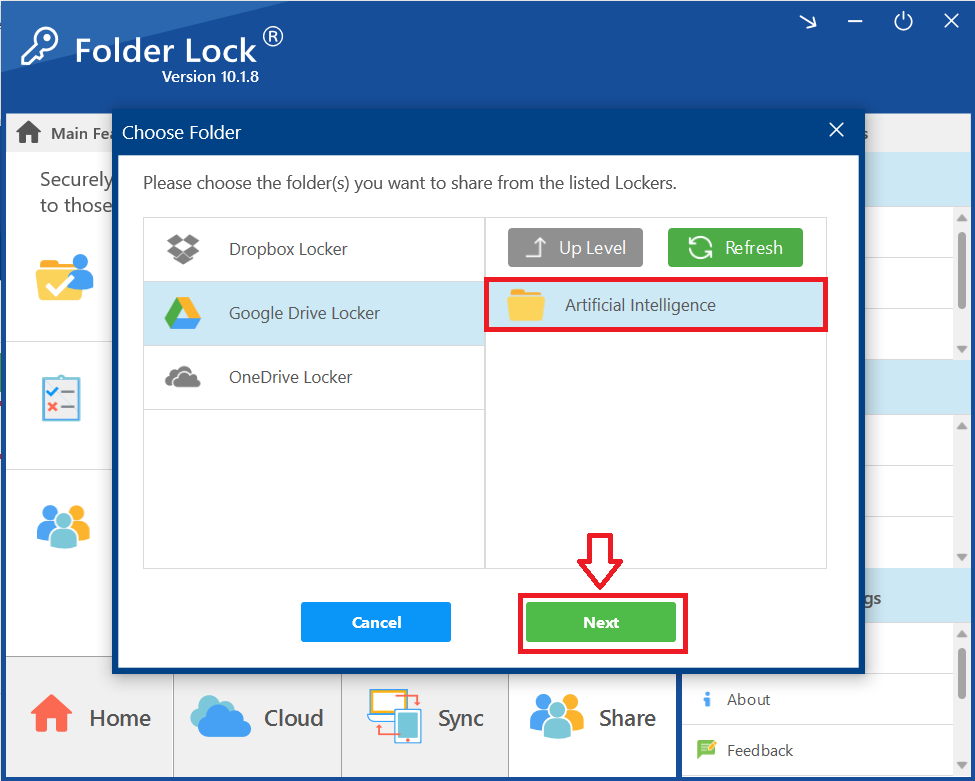
- Then, select the specific folder (e.g., "Artificial Intelligence") you wish to share.
- Proceed to Share Settings. Click the "Next" button.
Step 2: Applying Permissions to Your Shared Folder
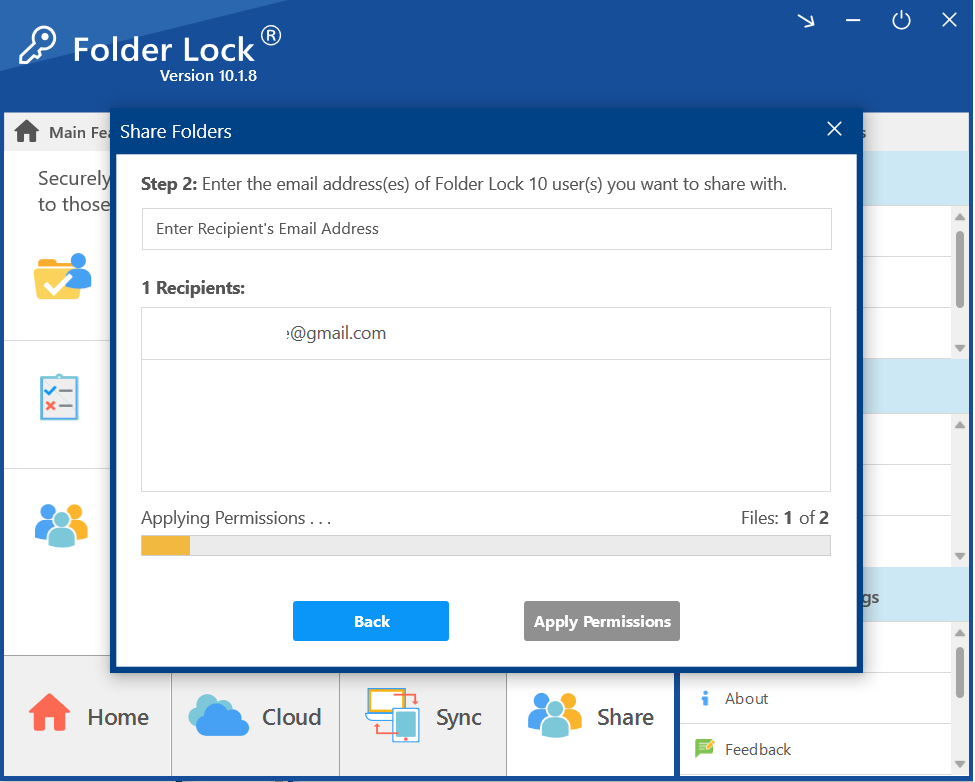
- A "Share Folders" window will appear, prompting you to enter the email address of the person you want to share with.
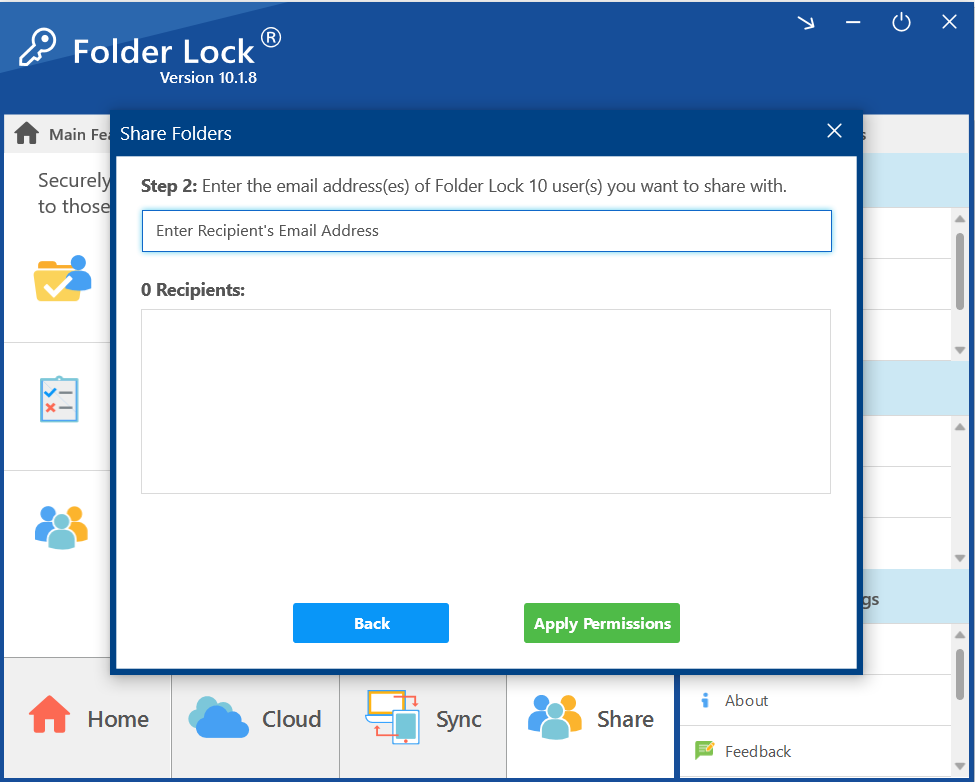
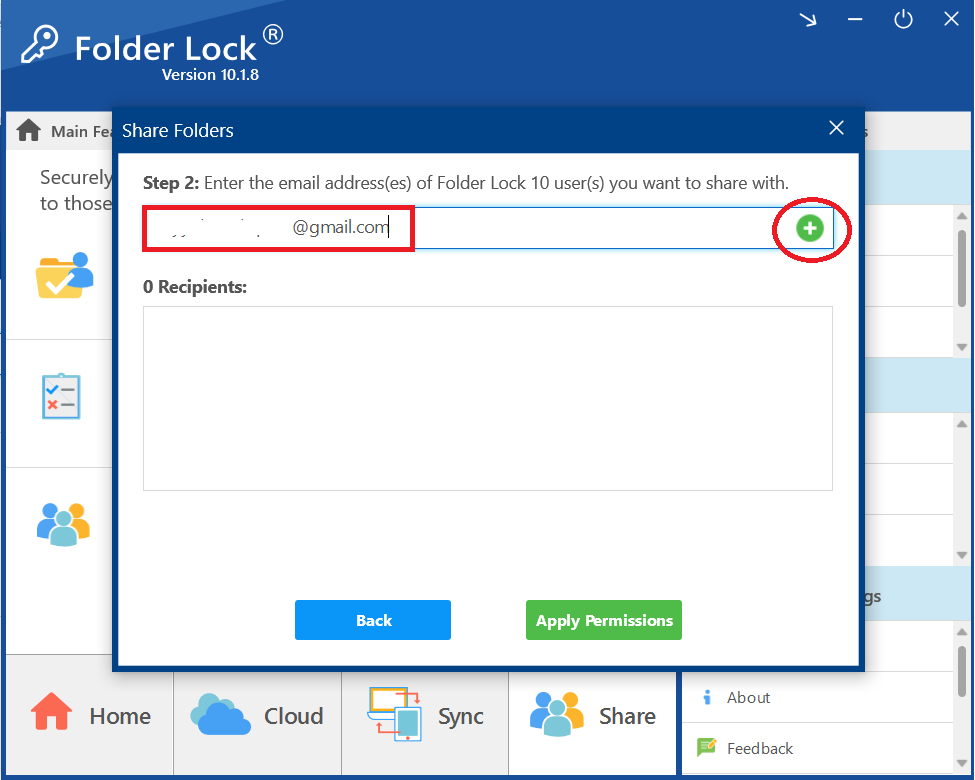
- Enter the Recipient's Email Address. Enter the recipient's email address in the provided field.

- Add the Recipient. Once the email address is entered, click the plus (+) button next to the field to add the recipient to the list. You can add multiple recipients as per your requirements.
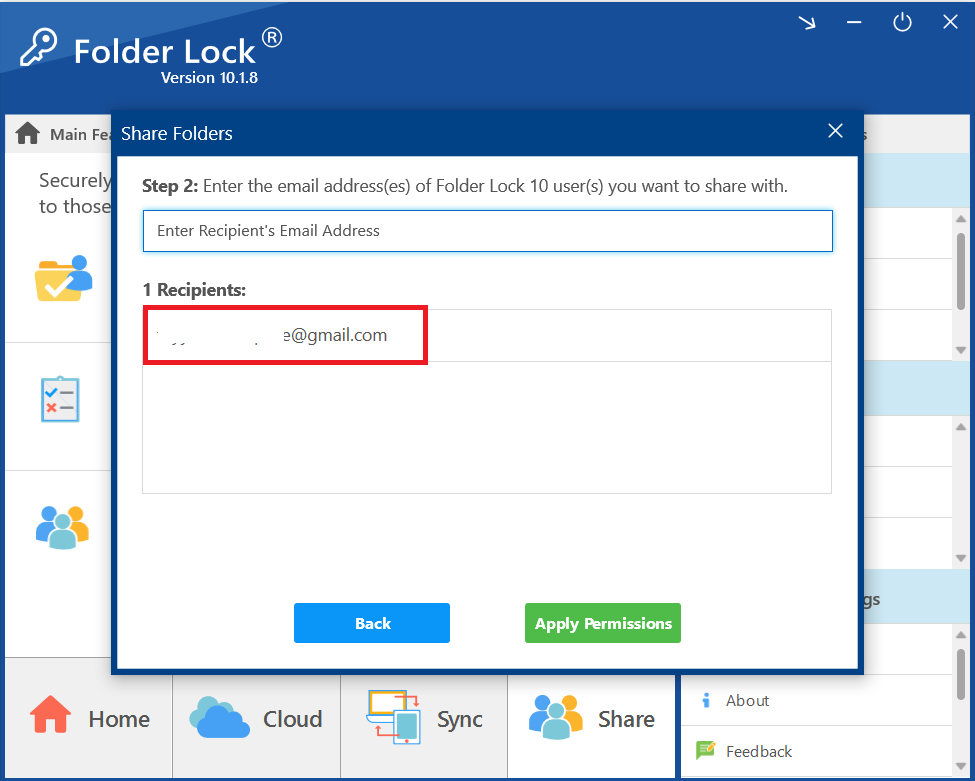
- Confirm the Recipient is Added. The recipient's email will now appear in the list below, showing that they have been added as a recipient.
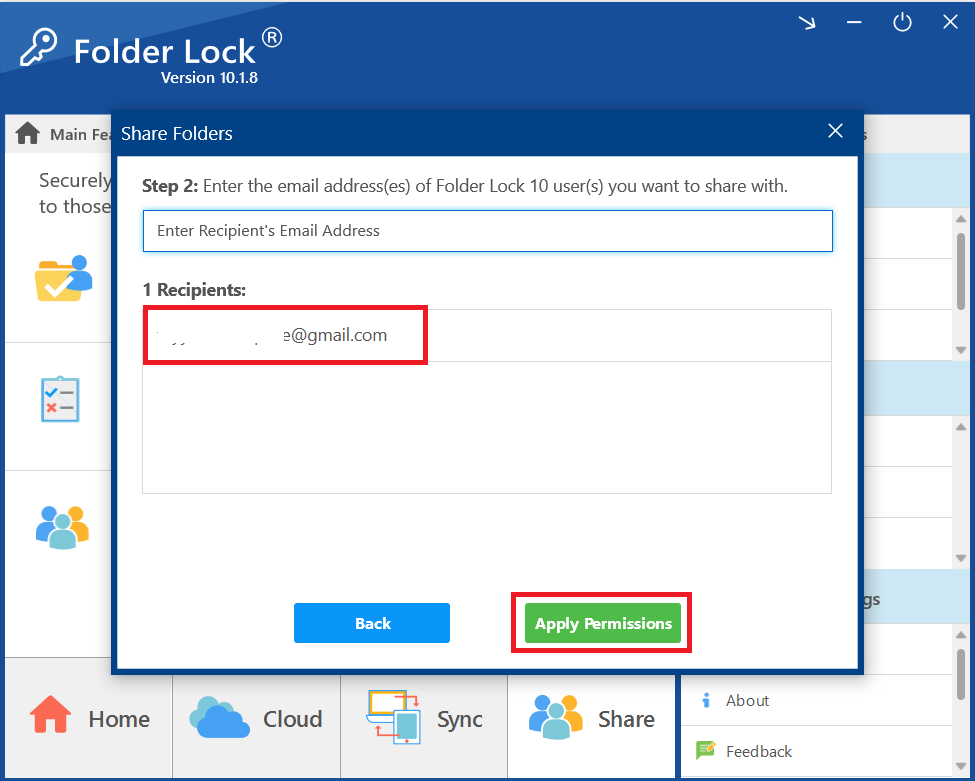
- Apply Permissions. After you have added all the desired recipients, click the green "Apply Permissions" button.
- Wait for Permissions to be Applied. A progress bar will appear, showing that Folder Lock is applying the permissions to your selected folder.
- Confirm Success. Once the process is complete, a pop-up window will appear with a green checkmark and a message stating, "Permissions applied!"
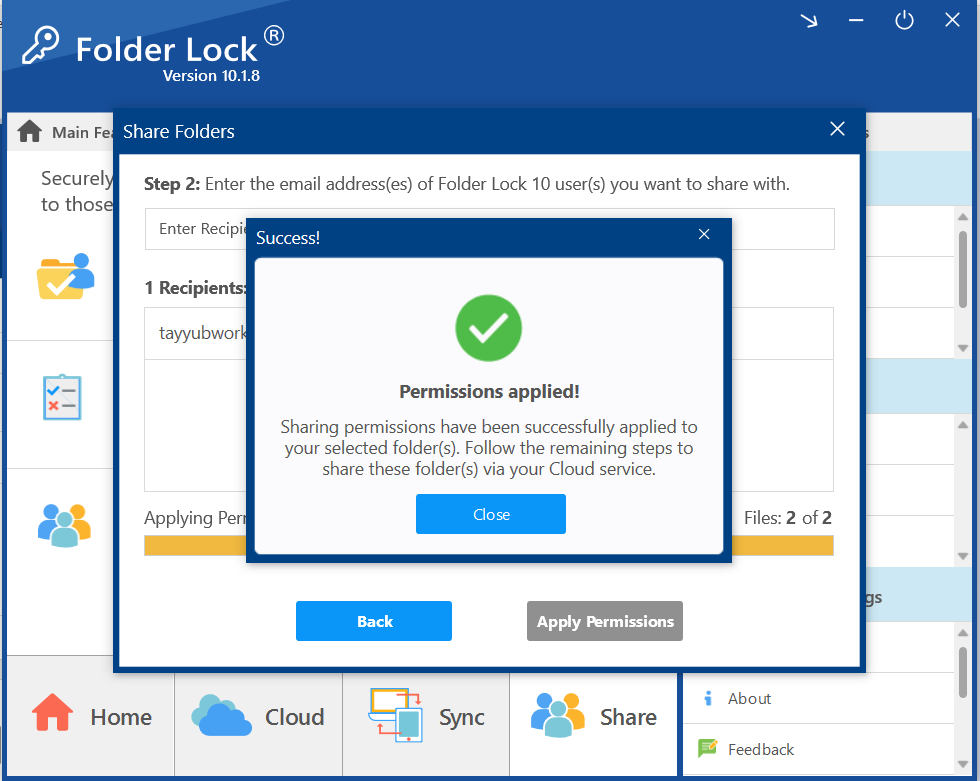
- Click "Close" to dismiss the message and continue with the sharing process via your cloud service
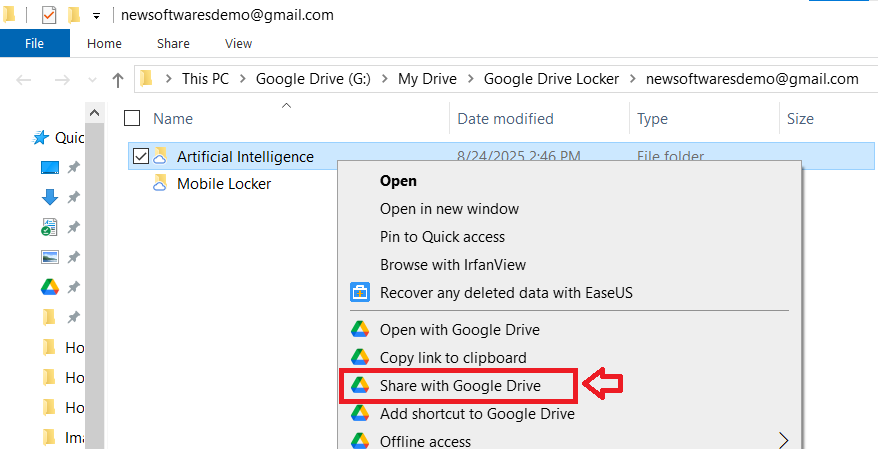
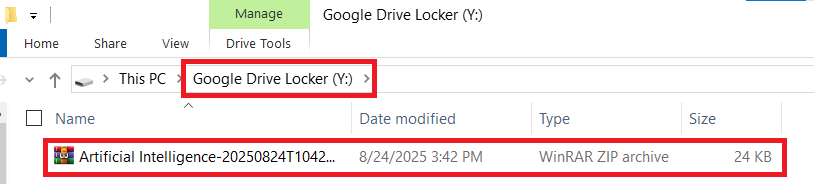
Step 3: Sharing a File from Google Drive Locker (Windows Explorer)
- Open the Google Drive Locker. Click on the link as show in screenshot.
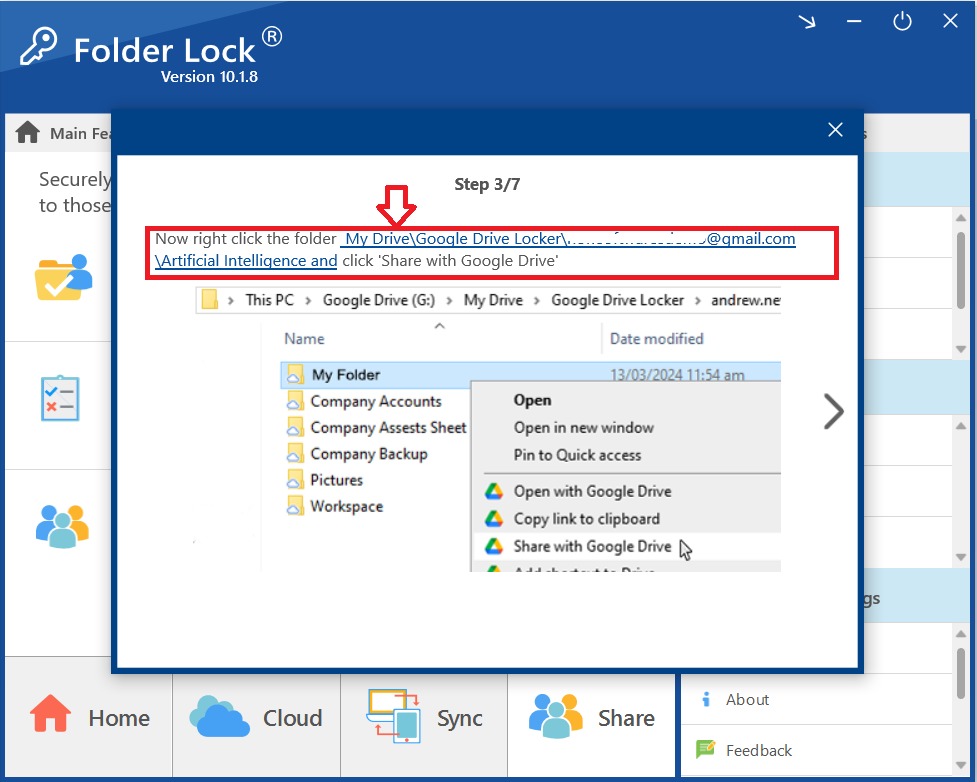
- Clicking on link will open your Google Drive Locker. Navigate to and select the folder or file you want to share (e.g., "Artificial Intelligence").
- Share with Google Drive. Right-click on the selected folder or file. From the context menu that appears, select "Share with Google Drive."
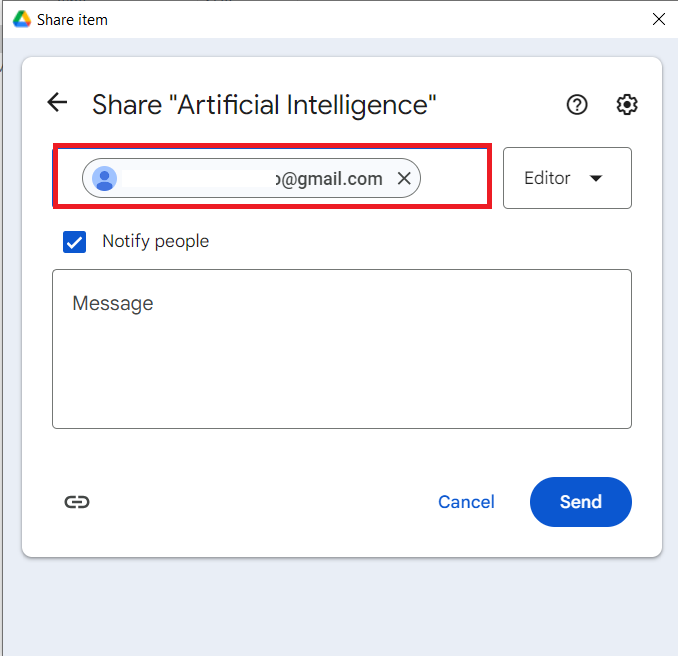
Step 4: Entering Recipient's Email Addresses
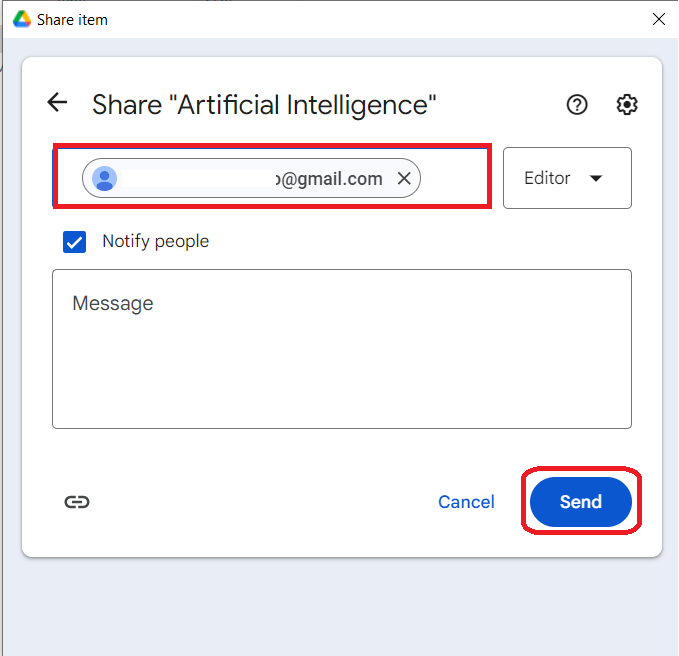
- Enter the Recipient's Email. A Google Drive "Share item" window will pop up. In the email address field, enter the email address of the recipient's Google Drive account.
- Click "Send". Click the blue "Send" button to send the shared folder invitation to the recipient.
Part 2: The Recipient's Process: Accessing and Securing the Shared File
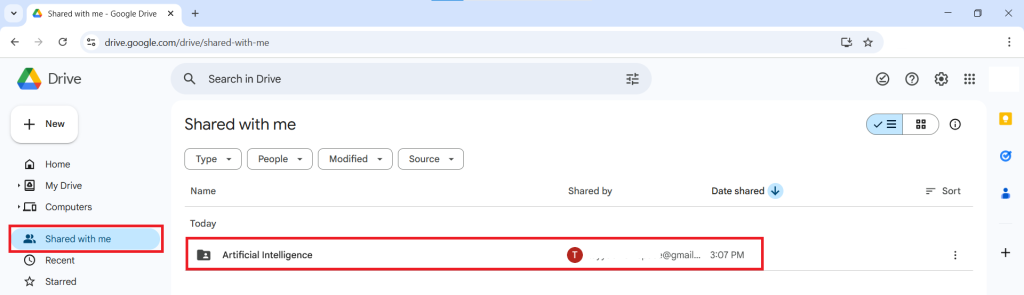
Once a file or folder has been shared with you, follow these steps to access it securely through your own Folder Lock application.Step 5: Locate the Shared Folder in Google Drive
- The recipient is to Log in to his online Google Drive account and navigate to the "Shared with me" section in the left-hand menu.
- The file or folder that has been shared with you will be listed here.
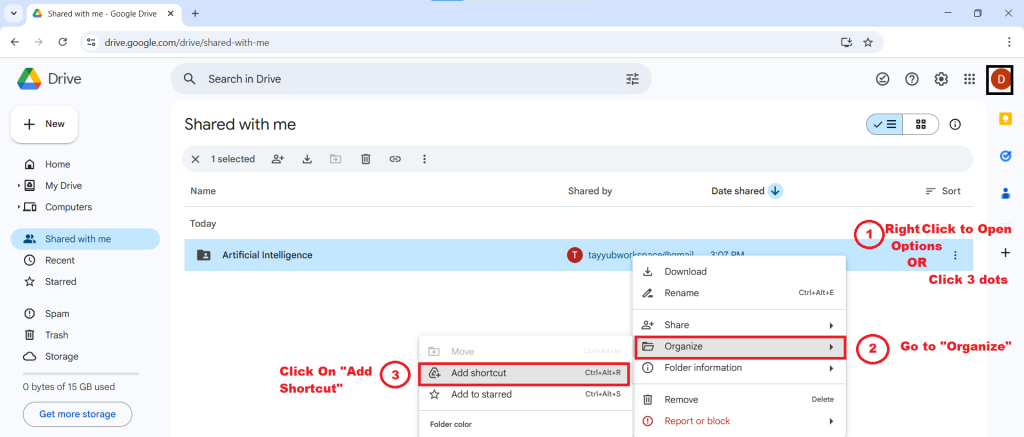
Step 6: Add the Folder to Your Drive
- To keep the folder in your drive for easy access, right-click on the shared folder.
- From the options that appear, select "Organize" and then "Add shortcut."
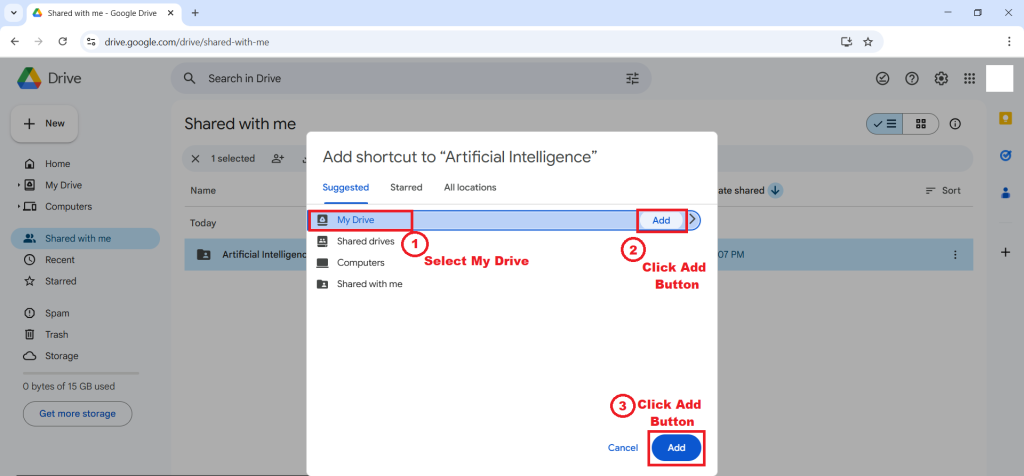
- A pop-up will ask for a location. Select "My Drive" and click the "Add" button. The shared folder is now part of your Google Drive.
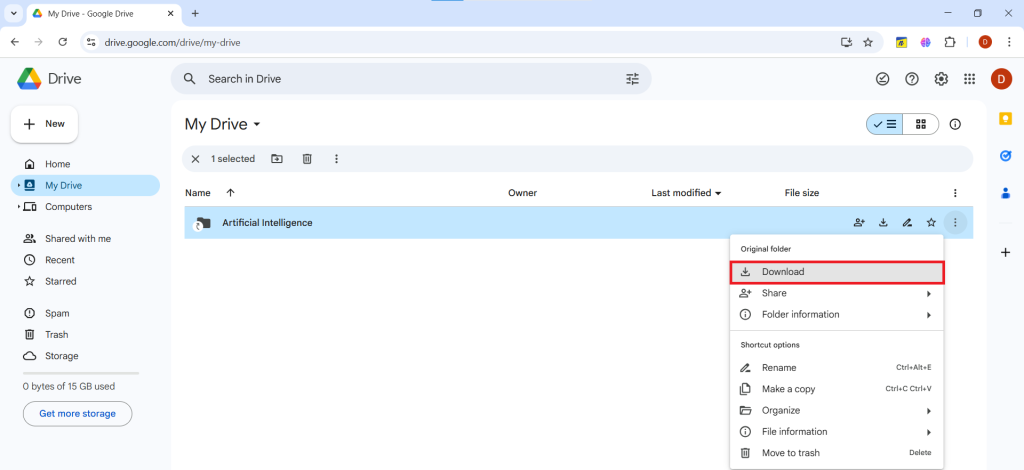
Step 7: Move the File to Your Google Drive Locker
- For the files to be properly secured and encrypted by your own Folder Lock application, you must now move the downloaded files into your local "Google Drive Locker."
- Click on 3 dots to locate download option for shared file. Click on "download".
- Your shared and downloaded file is ready to move. Click on Show in Folder. You can also access it from your browser downloads.
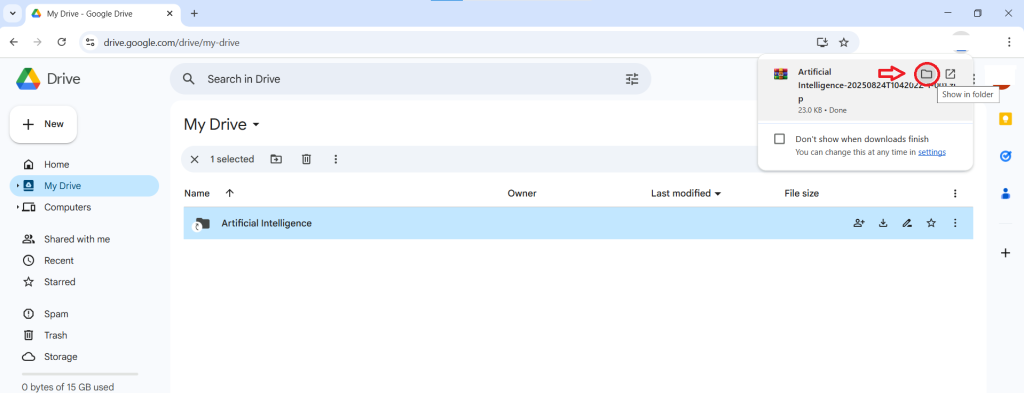
- From the downloaded folder, move your file to your Google Drive Locker
- Moving the file to your google drive locker ensures that the shared data is protected within your personal, encrypted vault.
By following these detailed steps, you have mastered the art of secure collaboration. The Folder Lock sharing feature provides a seamless workflow for both the sender and the recipient, ensuring that your confidential files remain encrypted and protected throughout the entire sharing process. You can now share your most sensitive data with confidence, knowing that its integrity is fully maintained every step of the way.